
FAQs
Follow the video or the steps below to use and operate your red light therapy panel
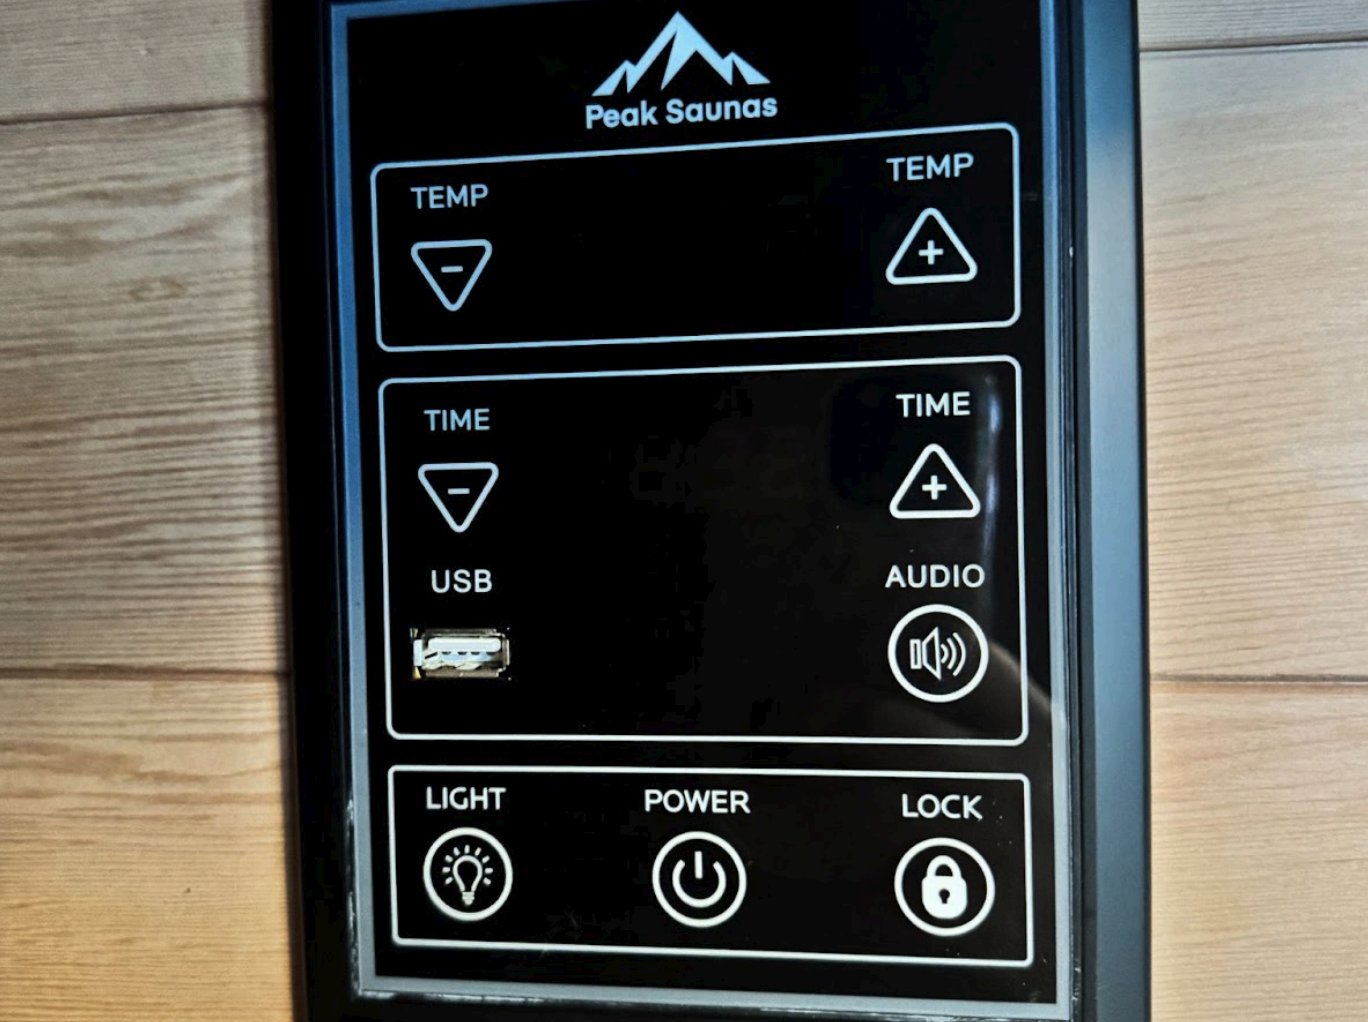
- Press the Power button located on the Sauna control panel (or start the saunaremotely via app)
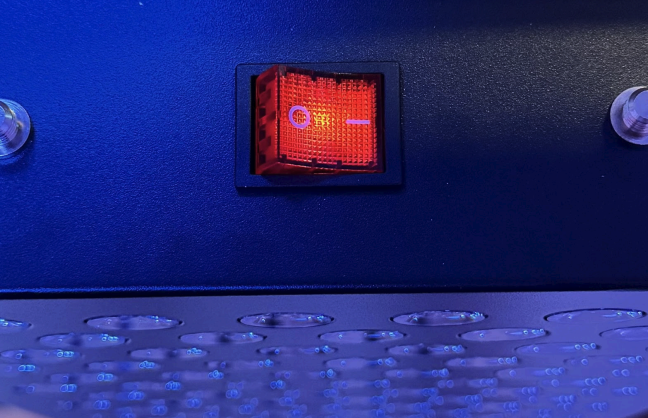
- Locate the switch at the top of the red light therapy panel and flip it from the O to | and it will light up red.
- Locate the touchscreen on the right side of the panel. Customize the settings to best meet your health goals.
IMPORTANT: The LED screen is only accessible in the 2-person models. 1 & 3 personmodels will require the Peak Saunas app interface to customize settings on the red lightpanel (s). Please refer to your manual for app instructions.
Select your settings:- Timer: Set the length of your red light therapy session.
- Mode: Choose if you want red light, near infrared light, or combination (itwill temporarily turn the light on to show you a preview of the setting youare choosing).
- Brightness: Choose the brightness of each individual wavelength (it willtemporarily turn the light on to show you a preview of the setting you arechoosing).
- Pulse: Allows you to choose the pulse setting for each wavelength ( itwill temporarily turn the light on to show you a preview of the setting youare choosing)
When you are ready to begin you press the back button (curved arrow) and then select the Start/Pause button on the main screen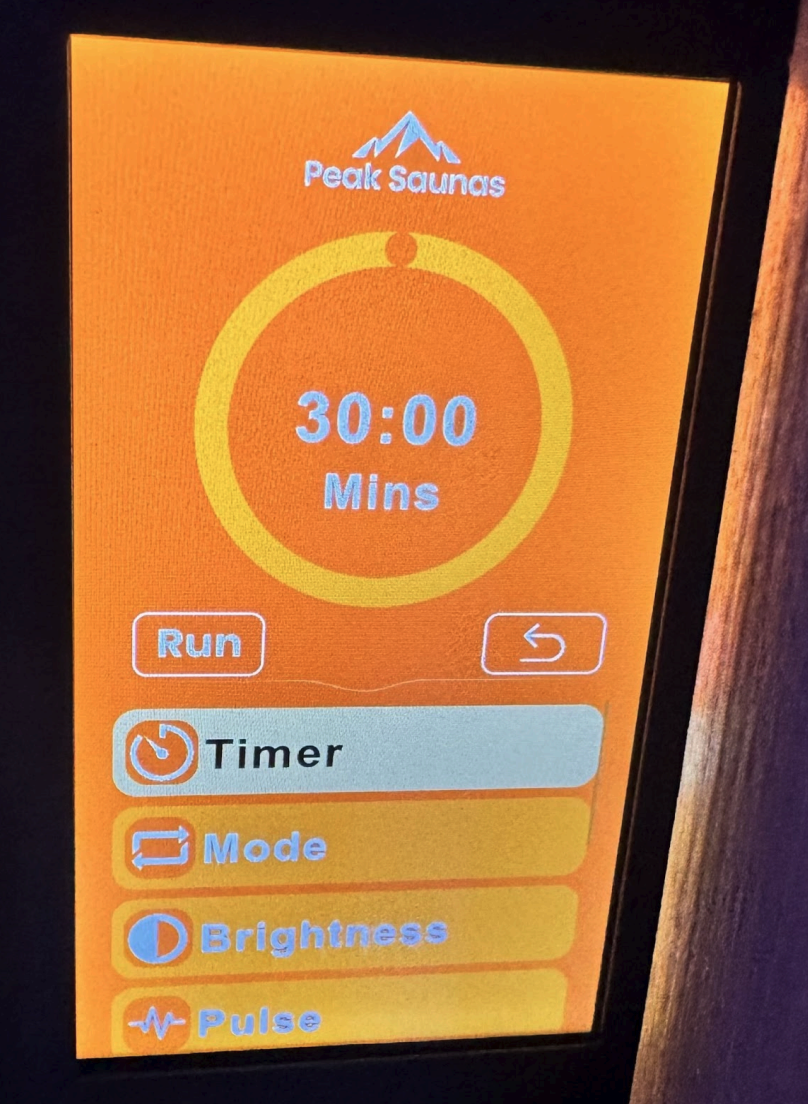
Additional information: the Remote
To operate the remote that comes with the red light therapy panel, you will need toinsert two CR2032 batteries that are not included with your package. From thereyou can follow the instructions below:
- Set: Selecting this button will bring you to the settings menu. Then witheach additional press of the ‘Set’ button it will bring you one at a timethrough the different menu options (timer, mode, brightness, pulse).
- +/- : Once on the setting menu you want to edit, you will press the + and -buttons to change the requested setting to your desired setting
- Play/Pause: Once ready to turn on the panel, you can select the play buttonand press the pause button when wanting to pause the panel operation orstop it entirely.
How to Share Your Sauna Device in the SmartLife App
- Open the SmartLife App - Launch the app on your smartphone.
- Access Device Settings - Navigate to your sauna device and tap on it to open its control panel.
- Enter Device Settings - Tap the pencil icon ( ) located in the upper right corner of the device panel.
- Share the Device
- Select “Share Device” from the menu.
- Add Sharing
- Tap “Add Sharing” and enter the email address of the person you wish to share the device with. Ensure they have a SmartLife account.
- Send Invitation
- Confirm the details and send the invitation. The recipient will receive an email to accept the shared device.
Tips for Successful Sharing
- Recipient’s Account: The person you’re sharing with must have a registered SmartLife account. If they don’t, they’ll need to create one.
- Control Level: Shared users can control the sauna device but cannot modify its settings or remove it from your account.
- Device Visibility: Once shared, the sauna will appear in the recipient’s device list, allowing them to operate it as you would.
Please find a video on how to operate the oyxigen ionizer below
Step 1: Turn on Ozone to deep clean (O3)
Press the O3 side of the ionizer to start a deep clean. You will know that it is on when the red light is lit up on that side. The ozone cycle runs for 15 minutes and may cause irritation, so do not stay inside the sauna during this process. After 15 minutes, it will automatically switch back to the ion setting. This process is recommended either during the preheat or upon leaving the sauna.
Step 2: Turn on Ionization to keep fresh (ion)
Press the Ion side of the ionizer to release negatively charged ions into the air. The yellow light indicates it is on, and it will continue running unless switched to Ozone. Pressing the Ion side will also stop the Ozone cycle.
FAQs
The vast majority of premium infrared saunas, including ours, are manufactured in China, which currently leads the world in advanced infrared technology.
Peak Saunas are designed here in the U.S., crafted in small batches with care in our warehouse in China, then quality-inspected before leaving our California warehouse. Every unit ships directly from California to ensure you receive the highest standard of performance and reliability.
Peak Saunas has been serving customers since 2019. We first built our reputation as one of the leading sauna dealers in the industry, and after years of experience selling top brands, we launched our own line to improve on the common pain points we saw in the market. While our Peak models are newer, they’re built by the same trusted manufacturing partner used by some of the most established sauna brands—ensuring the highest standards of quality and care.
We do not offer assembly, but most of our models are very DIY friendly.
Our FAR heaters are made from premium carbon, delivering optimal emissivity (99%), long-lasting performance, and proven wellness benefits. Our full-spectrum heaters use halogen/quartz technology, which is valued for its instant heat-up time, deep tissue penetration, and a more natural, sun-like spectrum of infrared wavelengths. This combination ensures both immediate comfort and maximum therapeutic results.
Please find the specifications of the red ligt panel here:
- Size: 9" x 36", designed for full-body coverage while seated
- LEDs: 216 high-output bulbs with 8 medical-grade wavelengths (630-1060nm)
- Smart Control: Fully customizable through the Peak Saunas App
- Features: Adjust brightness, fine-tune wavelengths, and choose targeted programs for skin health, muscle recovery, sleep optimization, and more
- Irradiance Report: 175 mW/cm² at 6", 107 mW/cm² at 12", 80 mW/cm² at 24"
The red light panel is removable; this means the red light therapy panel(s) in our saunas can be used either inside the sauna or somewhere else. It comes with additional hardware should the customer want to mount it somewhere else in their home.
Both woods are are long lasting and durable—it really just comes down to preference. Cedar has a rich color and natural aroma, and it’s naturally resistant to moisture, rot, and insects. Hemlock is hypoallergenic and has a lighter, more modern look with minimal scent, which many people prefer if you’re sensitive to smells or want a clean, minimalist aesthetic. Both perform beautifully in heat and humidity—it’s just a matter of whether you want that classic cedar aroma or a more neutral, contemporary feel.
Our outdoor saunas are built with space-grade aluminum—the same high-strength, lightweight material used in aerospace applications—chosen for its exceptional durability and resistance to rust, corrosion, and extreme weather. Each panel is finished with an electroplated baked varnish coating, a multi-stage process that electrochemically bonds protective layers to the metal before sealing it with a high-temperature baked finish. This creates a sleek, UV-resistant, weatherproof exterior that won’t warp, fade, or deteriorate over time, ensuring your sauna maintains its modern look and structural integrity for years to come.
Infrared saunas support your body’s natural detox process by helping you sweat out heavy metals, environmental chemicals (like BPA and phthalates), alcohol metabolites, and everyday waste products like urea. The infrared heat raises your core temperature, boosts circulation, and promotes deeper, more effective sweating—making it easier for your body to clear out what it doesn’t need. Let me know if you’d like more details!
CEVA is indeed one of the freight companies we use for delivery of our saunas, so when you receive a message please get in touch with them to schedule the delivery of your sauna!
We do not ship to Canada at this time, but we are looking to expand our operations later this year if you'd like to check back in then.
In most cases, protective goggles are not required while using an infrared sauna.
However, if your sauna includes built-in full-body red light therapy panels, we do recommend wearing protective goggles during your red light sessions—especially if you plan to sit facing the lights or keep your eyes open for extended periods.
Why goggles are recommended for red light therapy
Red light therapy can be very bright, and some customers find that the light intensity may cause:
• Eye discomfort or sensitivity
• Temporary glare or strain (similar to looking at a bright lamp)
Wearing goggles is a simple way to stay comfortable and fully relax during your session.
Good news: We include goggles for free
If your Peak Sauna model includes built-in full-body red light therapy, we provide protective goggles at no extra charge, so you have everything you need right out of the box.
Quick recommendation
✅ Infrared sauna use: Goggles not necessary
✅ Red light therapy use: Goggles recommended for comfort and eye protection
If you have any questions about the best setup for your specific sauna model, our team is happy to help.
Yes — carpet is completely fine for an indoor sauna.
Our indoor saunas are fully self-contained, which means they can safely sit on most standard household flooring surfaces, including:
Carpet
Hardwood
Tile
Laminate
Vinyl
Concrete
The only requirements
To ensure a stable setup and the best experience, just make sure the surface is:
✅ Flat
✅ Level
✅ Stable and sturdy
If your floor meets those simple requirements, your sauna will be good to go.
Please visit our website at www.peaksaunas.com and click on the Person Icon at the top right of the homepage. It is just to the left of the Cart Icon. Enter the email and password used when placing your order, then go to your account dashboard or order summary to view and pay your balance for your. If you forgot your password, use the 'Forgot Password' feature to reset it securely. 👍
Yes — distance absolutely matters when it comes to red light therapy.
Red light therapy works best when the light is positioned at an effective range from your body, so you’re getting strong, consistent exposure across the areas you want to target.
Why Distance Matters
Red light therapy is most effective when the panels are:
✅ Close enough to deliver meaningful light intensity
✅ Far enough to provide comfortable, full-body coverage
✅ Positioned for consistent results every session
If a panel is too far away, the light intensity can drop off and you may not get the same level of benefits.
The Good News: Peak Saunas Are Designed for the Optimal Distance
Our saunas are engineered so that when you’re sitting in the normal seated position, your body is naturally positioned at the ideal distance from our full-body red light therapy panels.
That means you don’t need to guess, measure, or reposition anything — it’s built into the design.
Full-Body Coverage (We Don’t Skimp)
A lot of saunas claim “red light therapy,” but only provide small panels with limited coverage.
At Peak Saunas, we design our red light setup for real full-body results, not just a marketing checkbox.
2-Person Models
Our full-body red light panels are positioned to serve two users at once, so both people get strong, even coverage during the same session.
3-Person Models
Our 3-person models include two full-body red light therapy panels, so all three users are covered optimally at the same time — without anyone getting “stuck in the weak spot.”
Bottom Line
✅ Yes, distance matters.
✅ Peak Saunas are designed so the red light panels are positioned at the optimal seated distance from your body.
✅ Our 2-person and 3-person models are built for real multi-user full-body coverage — we don’t skimp.
If you’d like, we can help you choose the best model for your layout and how many people you want to use it at once.
If you want to recline comfortably with your legs up, we typically recommend sizing up so you have enough interior depth to stretch out without feeling cramped.
Our Recommendation
✅ Best Choice:
2-Person Sauna
If reclining is a priority, a 2-person model is usually the best fit because it gives you:
More space to lean back comfortably
Room to bring your legs up on the bench
A more relaxed “lounger-style” session
Even if it’s just for one person most of the time, a 2-person sauna is the sweet spot for reclining comfort.
If You Want Maximum Lounge Comfort…
✅ Most Comfortable:
3-Person Sauna
If you want the most room to fully stretch out, change positions, and recline without any compromise, a 3-person model gives you the most flexibility.
This is especially ideal if:
You’re taller than 5' 10"
You want the most open feel
You plan to recline often
Can You Recline in a 1-Person Sauna?
You can, but it’s more limited.
A 1-person model is best if you’re prioritizing:
Small footprint
Fast heat-up
Seated sessions
If reclining with your legs up is a must-have, most customers are happier long-term with a 2-person.
Quick Rule of Thumb
✅ Mostly seated sessions → 1-person
✅ Reclining with legs up → 2-person
✅ Maximum lounging space → 3-person
If a customer is reaching out because they want to pay and cannot find how to pay their final invoice:
Direct them to email [email protected] who would be happy to forward that final invoice over to them. Also assure the customer not to worry over the listed due date as that is tied to the purchase date of the order and has no effect on the payment.
Yes! Peak Saunas are eligible for HSA/FSA purchase through our TrueMed integration.
How It Works
- At checkout, select TrueMed as your payment method
- TrueMed will email you a Letter of Medical Necessity within 2-3 minutes
- Complete their brief health survey
- Use your HSA/FSA card to complete payment
Questions about TrueMed? Contact their support at [email protected].
Timeline
- Processing: in-stock orders ship within 2-4 business days (pre-orders ship once the unit arrives at our warehouse)
- Transit: a few business days after it ships (varies by location)
- Total: typically arrives within 7-10 business days of ordering
What to Expect
You'll receive tracking via email. CEVA Logistics handles most deliveries - they'll contact you to schedule a delivery appointment.
Delivery Details
- Your sauna arrives on a pallet via freight truck
- Curbside delivery is standard
- Inside delivery available for an additional fee
Assembly
Most customers complete assembly in 45-90 minutes.
Yes! Peak Saunas are eligible for HSA/FSA purchase through our TrueMed integration.
How It Works
At checkout, select TrueMed as your payment method
TrueMed will email you a Letter of Medical Necessity within 2-3 minutes
Complete their brief health survey
Use your HSA/FSA card to complete payment
Questions About TrueMed?
Contact their support directly at [email protected]
After Each Session
Leave the door open to air out and allow moisture to evaporate.
Weekly Cleaning
Wipe all surfaces with a soft cloth dampened with warm water and mild soap
Rinse with a clean damp cloth
Allow to air dry completely
Monthly Deep Clean
Give extra attention to benches and backrests where sweat accumulates.
What NOT to Use
Bleach or ammonia
Harsh chemical cleaners
Abrasive scrubbers or pads
Pro Tip: Place a towel on the bench during sessions to absorb sweat and make cleanup easier.
Timeline
- Order Processing: in-stock orders ship within 2-4 business days (pre-orders ship once the unit arrives at our warehouse - see the product page for the ETA)
- Transit: a few business days after it ships (varies by location)
- Total: typically arrives within 7-10 business days of ordering
What to Expect
- Order Confirmation - Email immediately after purchase
- Shipping Notification - Tracking info when sauna ships
- Delivery Scheduling - Freight partner will contact you to schedule
- Delivery Day - Sauna arrives on pallet, curbside delivery standard
Assembly
Most customers complete assembly in 45-90 minutes.
Thank you for your service!
What You Get
3% discount on your purchase
FREE accessory (up to $100 value)
Who Qualifies
Active military
Veterans
First responders
How to Claim
Email [email protected] with proof of service, or verify at checkout.
Congratulations on your new sauna!
Your First Sessions
Week | Duration | Temperature |
|---|---|---|
Week 1 | 15-20 minutes | 125°F |
Week 2 | 20-30 minutes | 130-135°F |
Week 3+ | 30-45 minutes | 135-150°F |
Hydration
Drink water before, during, and after your session.
App Setup
Download the Peak Saunas app (iOS/Android) to control your sauna remotely:
Download from App Store or Google Play
Plug in your sauna and turn it on
Connect to the sauna's WiFi during initial setup
Follow in-app instructions
Thank you for being a proud Peak Sauna owner. We built your sauna to be one of the most powerful recovery tools available — and now we're making it even better.
Free for 60 days then $49 a month
The Peak Saunas Red Light Therapy panel is a built-in or add-on feature on select models. This article covers common questions about shipping, installation, and use.
DOES THE RLT PANEL SHIP SEPARATELY?
NO — the Red Light Therapy panel ships together in the same crate as the sauna unit.
INSTALLATION
Please refer to the step-by-step installation guide included with your shipment, or contact [email protected] for installation instructions specific to your model.
HOW TO USE THE RLT PANEL
Recommended session duration and optimal viewing distance vary by model. Refer to your product manual for wavelength specs and usage guidelines.
TROUBLESHOOTING
Panel not turning on:
- Check the power connection at the back of the unit
- Ensure the sauna controller is powered on
- Check if the LED switch or LED panel have any light/power
Panel flickers:
- Check all power connections are fully seated
- Contact support if the issue persists
App not connecting to panel:
- Ensure you're connected via bluetooth
- Restart the app and re-attempt pairing
- See our WiFi & App Setup Troubleshooting article for full steps
WARRANTY
The RLT panel is covered under the standard Peak Saunas warranty. Contact [email protected] for warranty claims.
What Are the Electrical Requirements for My Peak Sauna?
Getting your electrical setup right before your sauna arrives saves time, money, and frustration. Different models have different power needs — here's exactly what you need to know.
Standard 120V / 15A Outlet (No Electrician Needed)
The following models plug directly into a standard household outlet — the same kind you'd use for a lamp or TV. No electrician, no special wiring.
Model | Capacity |
|---|---|
Olympus | 1-Person |
Aspen | 1-Person |
Shasta | 1-Person |
Rainier | 1-Person |
Crown | 2-Person |
What you need: A dedicated 120V / 15A outlet within reach of the sauna's power cord. We recommend not sharing the circuit with other high-draw appliances.
Dedicated 120V / 20A Outlet (Electrician Recommended)
These models need a dedicated 20-amp circuit — not the standard 15A outlet found in most homes. An electrician can install one for approximately $150–$250.
Model | Capacity |
|---|---|
Everest | 2-Person |
Fuji | 2-Person |
Important: Plugging the Everest or Fuji into a standard 15A outlet may cause your circuit breaker to trip. This is the most common electrical issue we see — and it's easily avoided by having the right outlet installed before your sauna arrives.
Dedicated 240V / 20A Circuit (Electrician Required)
These larger models require a 240-volt, 20-amp dedicated circuit — similar to what a clothes dryer uses. Budget approximately $200–$400 for installation.
Model | Capacity |
|---|---|
Denali | 3-Person |
Matterhorn | 3-Person |
Patagonia | 2-Person Outdoor |
Dedicated 240V / 30A Circuit (Electrician Required)
Our largest outdoor models require a 240-volt, 30-amp dedicated circuit with an outdoor-rated enclosure. Budget approximately $300–$500 for installation.
Model | Capacity |
|---|---|
Kilimanjaro | 5-Person Outdoor |
El Capitan | 4-Person Outdoor |
Pro Tips for Electrical Setup
Schedule your electrician before your sauna arrives. This is especially important for pre-order models — use the wait time to get your wiring ready.
Use a dedicated circuit. Even for 120V models, avoid sharing the outlet with space heaters, vacuums, or other high-draw appliances.
Outdoor models need outdoor-rated circuits. Your electrician should install a weatherproof outlet box rated for exterior use.
Ask your electrician about placement. The outlet should be within reach of the sauna's power cord (typically 6–8 feet from the sauna location).
Still Have Questions?
Not sure which outlet you have or what you need? Send us a photo of your outlet and we'll help you figure it out. Reach out at [email protected] or (470) 665-3747.
This is one of our most frequently asked questions — and the answer depends on a few factors. Here's what to expect and how to optimize your heat-up time.
Typical Heat-Up Times
Indoor models: Most reach 140°F in 30–40 minutes and maximum temperature (150°F) in 45–60 minutes
Outdoor models: Reach 150°F in 30–40 minutes and maximum temperature (170°F) in 45–60 minutes
These times assume a room temperature starting point of about 65–72°F.
Factors That Affect Heat-Up Time
Starting Room Temperature
A sauna in a heated basement at 70°F will warm up faster than one in an unheated garage at 40°F. If your sauna is in a cooler space, expect an extra 10–15 minutes of heat-up time.
Ambient Airflow
Avoid placing your sauna directly under a vent or near a drafty area. Moving air around the exterior can slow the heating process.
Door Seal
Make sure the door is fully closed and seated properly. Even a small gap lets heat escape and significantly increases warm-up time.
Electrical Supply
If your model requires a dedicated 20A or 240V circuit and you're running it on an undersized outlet, it won't reach full power. This is the most common cause of unexpectedly slow heating — check your electrical requirements first.
The Infrared Difference
Here's something important to understand: you don't need to wait for maximum temperature to start your session. Unlike traditional Finnish saunas that heat the air to 180–200°F, infrared saunas work by heating your body directly from the inside out.
Many of our customers begin their session at 110–120°F and let the temperature continue climbing while they're inside. You'll start sweating well before the thermometer hits 150°F — and you'll get the full therapeutic benefit.
How to Preheat Remotely
Every Peak Sauna comes with SmartLife app compatibility, allowing you to:
Turn your sauna on from anywhere using your phone
Set your target temperature
Get it warming up while you finish your workout, commute home, or wrap up your day
This is a game-changer for busy schedules. Set it to preheat 30–45 minutes before you want to use it, and it'll be ready when you are.
Note: The SmartLife app controls sauna heat and temperature. If you have a model with Red Light Therapy, the RLT panel is controlled separately through the Peak Saunas RLT app.
Troubleshooting Slow Heat-Up
If your sauna consistently takes over 60 minutes to reach temperature:
Check your circuit — make sure you're on the correct amperage (see our Electrical Requirements Guide)
Inspect the door seal — make sure nothing is preventing a tight close
Check for the door sensor alert — if the control panel shows "door open," the sauna may not be heating at full power
Move away from cold zones — garages in winter will always take longer; consider insulating the space around the sauna
Still Have Questions?
If your sauna isn't heating as expected even after checking these steps, reach out to us at [email protected] or (470) 665-3747. A quick video showing your control panel readings helps us troubleshoot faster.
What Does My Peak Saunas Warranty Cover?
Every Peak Sauna comes with a comprehensive warranty designed to give you peace of mind. Here's a complete breakdown of what's covered and for how long.
Warranty Coverage by Component
Lifetime Warranty
Structure & Wood — The bones of your sauna are covered for the life of the unit (7 years). This includes the wall panels, floor, roof, and bench structure.
5-Year Warranty
Heating Elements — All infrared heater panels (far, mid, and near infrared) are covered for 5 years.
3-Year Warranty
Electrical Components & Control Panel — This covers the main power box, wiring harnesses, and digital control panel.
2-Year Warranty
Red Light Therapy Panel — The medical-grade RLT panel (on models that include it) is covered for 2 years.
1-Year Warranty
Lighting (interior and exterior LED lights)
Sound System (Bluetooth speakers)
WiFi & App Connectivity (SmartLife integration)
Thermometers
Ionizer
Accessories (backrests, cup holders, etc.)
How to File a Warranty Claim
Contact us at [email protected] with your order number
Describe the issue — photos and short videos help us diagnose the problem faster
Our team will troubleshoot — many issues can be resolved with simple steps over email
If a replacement part is needed, we'll ship it to you at no charge
What's NOT Covered
Labor for damage or replacements is not covered under warranty
Normal wear and tear — minor wood settling, natural color changes, and small cosmetic variations are normal characteristics of real wood
Misuse or modification — unauthorized modifications, using the sauna outdoors when it's an indoor model, or electrical damage from improper wiring
Commercial use — residential warranties are voided if the sauna is used commercially. A separate 5-year commercial warranty is available for business use.
Cosmetic damage after delivery — scratches, dents, or damage that occurs during or after assembly
Replacement Parts
If a component fails within the warranty period, we ship replacement parts at no cost to you. Common replacement parts include:
Heater panels
Control panels
Speakers
Door sensors
Light fixtures
Cushions and backrests
Replacement parts are typically made-to-order and may take up to 30 days to arrive if in stock at our warehouse and up to 60-90 days if it has to be special ordered from our manufacturer. We'll keep you updated on the timeline.
Transferring Your Warranty
Moving and selling your sauna? The warranty stays with the original purchaser and is not transferable. The original order number and email are required for all warranty claims.
Still Have Questions?
Our warranty is designed to back you up for the long haul. If something goes wrong, we'll make it right. Contact us at [email protected] or (470) 665-3747.
Red Light Therapy (RLT) is one of the most exciting features in Peak Saunas — and for good reason. It's a clinically studied, non-invasive treatment that complements your infrared sauna session beautifully.
How Red Light Therapy Works
Red Light Therapy uses specific wavelengths of visible and near-infrared light (typically 630–1060nm) to penetrate your skin and stimulate cellular energy production. When these wavelengths reach your cells, they boost mitochondrial function — essentially giving your cells more energy to repair, regenerate, and perform at their best.
Peak Saunas' Medical-Grade RLT Panel
Our RLT panels aren't generic LED strips. They're medical-grade panels featuring:
216 dual-chip LEDs (on front-facing panels)
8 different wavelengths spanning the therapeutic spectrum (630–1060nm)
175 mW/cm² irradiance — this is a clinical-grade power output, not a decorative glow
Full spectrum coverage — red, deep red, and near-infrared wavelengths working together
Which Models Include Red Light Therapy?
Front-Facing Medical-Grade Panel (Full Coverage):
Shasta (1-Person)
Rainier (1-Person)
Everest (2-Person)
Fuji (2-Person)
Patagonia (2-Person Outdoor)
Kilimanjaro (5-Person Outdoor)
Dual RLT Panels (Maximum Coverage):
Matterhorn (3-Person)
Denali (3-Person)
El Capitan (4 Person Outdoor)
Ceiling-Mounted RLT (Limited Coverage):
Crown (2-Person)
No Red Light Therapy:
Olympus (2-Person) — FAR infrared only
Aspen (1-Person) — FAR infrared only
Reported Benefits of Red Light Therapy
Research suggests RLT may support:
Skin health — collagen production, reduced fine lines, improved tone
Muscle recovery — faster recovery after workouts, reduced soreness
Joint support — reduced inflammation and stiffness
Circulation — enhanced blood flow and oxygen delivery
Mood and sleep — improved energy levels and sleep quality
Note: These are reported benefits based on published research. Peak Saunas does not make medical claims. Consult your healthcare provider for specific health questions.
Controlling Your RLT Panel
Your RLT panel is controlled separately from the sauna heaters using the Peak Saunas RLT App (available on iOS and Android). This app lets you:
Choose which wavelengths to activate
Adjust intensity
Set session timers
Create custom protocols
Important: The RLT app controls only the red light panel. Sauna temperature and heat are controlled through the SmartLife app — these are two separate apps for two separate systems.
Using RLT During Your Sauna Session
For maximum benefit, we recommend:
Start your sauna session and let it warm up
Turn on your RLT panel when you're seated and comfortable
Position yourself facing the panel (for front-facing models) at a comfortable distance
Run both simultaneously for the duration of your session
The combination of infrared heat and red light therapy creates a synergistic wellness experience — the heat opens your pores and increases circulation while the RLT penetrates your tissues.
Still Have Questions?
Want help choosing the right model for your red light therapy goals? Our team can walk you through the options. Reach out at [email protected] or (470) 665-3747.
Bench Heater Panel Temperature
Understanding why bench panels feel different from wall panels
The Question
"The heating panel in my bench doesn't get as hot as the wall panels. Is something wrong?"
Short answer: Probably not — this is normal by design.
Why Bench Panels Run Cooler
1. Different Purpose
Wall panels: Direct infrared therapy to your body
Bench panels: Warm your seating surface for comfort
The bench panel isn't meant to deliver the same intensity as therapeutic panels — it's designed to make sitting comfortable.
2. Position Matters
Bench panels face upward and heat disperses differently
You're sitting on/near them, so lower temperatures prevent discomfort
Wall panels face directly at you for maximum therapeutic effect
3. It's Working If...
Your bench panel is functioning correctly if:
✅ It gets warm to the touch (not blazing hot)
✅ It's noticeably warmer than room temperature
✅ It heats up within 10-15 minutes of starting your session
When to Contact Support
Reach out if your bench panel:
❌ Stays completely cold (no warmth at all)
❌ Has visible damage or burn marks
❌ Makes unusual sounds
❌ Shows error codes on the control panel
Quick Check
Verify the panel is plugged in (check internal connections)
Confirm it's enabled in settings (touchscreen or app)
Give it 20+ minutes to reach operating temperature
Touch it carefully — it should be warm, not hot
Comparing Temperatures
If you want to verify operation:
Panel Location | Expected Feel |
|---|---|
Wall panels | Hot (uncomfortable to touch for long) |
Bench/floor panels | Warm (comfortable to sit on) |
This difference is intentional for your comfort and safety.
Still concerned? Email [email protected] with your sauna model and we'll verify your panel is operating correctly
Warranty Coverage & Replacement Parts
Every Peak Sauna is backed by our comprehensive warranty. Here's what's covered and how to get help if something goes wrong.
Warranty Coverage
Standard Warranty Terms
Component | Coverage Period |
|---|---|
Structural (wood, frame) | Lifetime |
Heating elements | 5 years |
Electrical components | 3 years |
Control panel/electronics | 3 years |
Red light therapy panels | 2 years |
What's Covered
✅ Manufacturing defects in materials or workmanship ✅ Heating elements that fail under normal use ✅ Electrical components that malfunction ✅ Control panel issues not caused by power surges ✅ Structural issues (warping, splitting under normal indoor use)
What's NOT Covered
❌ Damage from improper installation or use ❌ Labor for warranty claims under normal circumstances ❌ Cosmetic wear (minor scratches, wood aging) ❌ Damage from power surges (use a surge protector!) ❌ Modifications or repairs by unauthorized parties ❌ Commercial use (residential warranty only) ❌ Outdoor exposure for indoor models
How to Request Warranty Service
Step 1: Gather Information
Before contacting us, please have ready:
Your order number
Photos or video showing the issue
Brief description of what's happening
When the issue started
Step 2: Contact Support
Email [email protected] with the information above.
Response time: We respond within 24-48 hours during business days (Mon-Fri 8am-7pm, Sat 12pm-7pm CST).
Step 3: Troubleshooting
Our team will walk you through basic troubleshooting to diagnose the issue. Many problems can be resolved with simple fixes like:
Checking wire connections
Resetting the control panel
Adjusting temperature sensor placement
Step 4: Resolution
Based on the diagnosis, we'll provide one of these solutions:
Replacement Part Shipped
We'll ship the replacement part at no cost
Most parts ship within 3-5 business days
Installation guides or video support provided
Technician Dispatch
For complex issues requiring on-site repair
We'll coordinate with our technician network
Not always covered under warranty. May incur additional fees
Large Scale Replacement
Rare, but available for major defects discovered within 30 days
We handle all logistics
Common Replacement Parts
These are the parts we most frequently ship:
Part | Typical Issue | Self-Install? |
|---|---|---|
Heating panel | No heat from one section | Yes, easy |
Power Box | Power errors | Yes, moderate |
Control panel | Display issues, unresponsive | Yes, moderate |
Power cord | Damaged or wrong length | Yes, easy |
Door seal | Air leaks | Yes, easy |
RLT panel | Lights not working | Yes, easy |
Self-Repair vs. Technician
You Can Handle It If:
The part simply plugs in or connects with clips
We provide a video guide for the repair
You're comfortable with basic DIY tasks
Request a Technician If:
The issue involves hardwiring or 240V electrical
You're not comfortable with the repair
Troubleshooting hasn't resolved the issue
Extending Your Coverage
While we don't currently offer extended warranty plans, here are ways to maximize your sauna's lifespan:
Use a surge protector — Power surges are the #1 cause of non-warranty issues
Follow the cleaning guide — Regular maintenance prevents problems
Keep the door closed — Except during the post-session air-out period
Report issues early — Small problems are easier (and cheaper) to fix
Contact Information
Email: [email protected] Phone: 312-548-8943 (Mon-Fri 8am-7pm, Sat 12pm-7pm CST)
Keep your order confirmation email — it contains your order number and serves as proof of purchase for warranty claims.
Floor Design & Moisture Management
Understanding how moisture works in your sauna helps you protect both the sauna and your flooring underneath
Do Peak Saunas Have Floors?
Indoor Saunas
All Peak indoor saunas have a sealed floor panel
Moisture Expectations
Normal Moisture Levels
Infrared saunas produce less moisture than traditional saunas because:
No water is poured on rocks
Heat is dry radiant heat
Most sweat evaporates during the session
You may notice:
Light perspiration on benches (normal)
Occasional drips on the floor (normal)
Slight humidity increase in the room (normal)
What's NOT Normal
Contact support if you see:
Pooling water inside the sauna
Water dripping from walls or ceiling
Condensation on the exterior of the sauna
Protecting Your Floor
For Indoor Saunas
Use a towel on the floor or bench (will not impact benefits)
Leave the door open after sessions to air out
Wipe down benches and floor after heavy sweat sessions
Questions About Your Specific Model?
Email [email protected] with your model name and we'll provide specific care instructions.
Using Your Sauna in a Garage or Cold Climate
Yes, you can use your Peak Sauna in a garage or cold environment! Here's what you need to know.
Minimum Operating Temperature
Peak infrared saunas can operate in ambient temperatures as low as 40°F (4°C). Below this:
Heaters work harder and may not reach full temperature
LCD displays may respond slowly
Electronic components may be stressed
If your space drops below freezing (32°F/0°C): Consider a small space heater to pre-warm the area before sauna sessions.
Heat-Up Time in Cold Environments
Ambient Temp | Typical Heat-Up Time (depends on model) |
|---|---|
70°F (21°C) | 20-30 minutes |
50°F (10°C) | 30-40 minutes |
40°F (4°C) | 35-50 minutes |
Tip: Use the app or timer to pre-heat your sauna before you're ready to use it.
Garage Installation Tips
Placement
Away from vehicles — exhaust fumes and car doors can damage the wood
On a level surface — concrete floor is ideal
Clear of clutter — ~6 inches clearance on all sides for airflow
Insulation Considerations
Your sauna is already insulated, but a very cold garage makes it work harder. To help:
Use weatherstripping on the garage door
Consider insulating the garage ceiling if it's uninsulated
A small space heater (not pointed at the sauna) can pre-warm the space
Electrical
120V saunas: Plug into a dedicated outlet (not an extension cord)
240V saunas: Must be hardwired by a licensed electrician
GFCI protection is recommended for garage installations
Protecting Electronics in Unheated Spaces
Infrared sauna electronics are rated for normal residential use. In a cold garage:
What to Watch For:
Condensation — when a cold sauna heats up quickly, moisture can form on electronics
Battery backup — some control panels have small batteries that drain faster in cold
Prevention:
Let the sauna warm up gradually (don't blast to max immediately)
Leave the door slightly open for the first 5 minutes to prevent condensation
If the garage is very damp, consider a small dehumidifier
Can I Leave It in an Unheated Space Over Winter?
Yes, but:
Don't leave it plugged in if temperatures drop below freezing for extended periods
Run it at least once a month during winter to keep components active
Check for pests — mice and insects may seek shelter in an unused sauna
What About Outdoor Saunas?
Our outdoor models (Patagonia, etc.) are designed for exterior use and can handle:
Temperature extremes
Rain and snow (roof designed for drainage)
Direct sun exposure
Still, we recommend:
Using a cover during extended periods of non-use
Clearing snow from the roof after heavy storms
Checking seals annually
Questions?
Email [email protected] with your model and garage setup — we're happy to provide specific recommendations.
My Sauna Shows a "Door Open" Alert But the Door Is Closed
If your control panel displays a "door open" alert and the sauna won't turn on even though the door is shut, the issue is almost always the door sensor alignment — and it's usually an easy fix.
What Causes This?
Your Peak Sauna may have a magnetic door sensor that tells the control panel whether the door is open or closed. This is a safety feature — the sauna won't heat if it thinks the door is open. The sensor can become misaligned during shipping, assembly, or regular use.
How to Fix It (Step by Step)
1. Locate the Door Sensor
Open the door and look for a small round or rectangular magnet on the edge of the door. On the door frame (usually the top or side), there's a matching sensor unit.
2. Check Alignment
Close the door firmly. The magnet on the door should align directly with the sensor on the frame — they need to be within about ¼ inch of each other. If they're offset, the sensor can't detect the closed door.
3. Re-Align the Sensor
If the sensor or magnet has shifted:
Gently adjust the magnet on the door edge so it sits directly opposite the sensor
If it's loose, press it firmly back into its mount
On some models, the sensor on the frame can be repositioned by loosening a small screw, sliding it into alignment, and re-tightening
4. Test It
Close the door and check the control panel. The "door open" alert should disappear, and you should be able to power on the sauna normally.
5. Check the Door Latch
If the sensor alignment looks correct, make sure the door is closing completely. Sometimes the door latch doesn't fully engage, leaving a small gap. Check that:
Nothing is blocking the door from closing flush
The latch clicks securely when the door closes
The glass door isn't warped or shifted on its hinges
If It Still Doesn't Work
If re-alignment doesn't solve the issue:
Disconnect and reconnect the sensor's wiring harness (located behind the wall panel near the door frame)
Power cycle the sauna — unplug it from the wall, wait 30 seconds, and plug it back in
Contact us at [email protected] with a photo or video showing the sensor alignment and the alert on your control panel
In rare cases, the sensor unit itself may be faulty. If so, we'll ship a replacement at no charge under warranty.
Still Have Questions?
The door sensor is a simple safety feature that occasionally needs a quick adjustment. If you're having trouble, our team is here to help at [email protected] or (470) 665-3747.
How Long Should I Use My Sauna? Tips for the Best Session
Whether you're a first-time sauna user or a seasoned veteran, getting the most out of your Peak Sauna sessions comes down to a few simple habits.
Recommended Session Length
Beginners: Start with 15–20 minutes at a lower temperature (110–130°F)
Regular users: 30–45 minutes at your preferred temperature (130–150°F)
Maximum: We recommend not exceeding 45 minutes per session
Your body will tell you when it's had enough. If you feel dizzy, lightheaded, or uncomfortable at any point, end your session and cool down.
Optimal Temperature
Unlike traditional saunas that blast air at 200°F+, infrared saunas deliver therapeutic benefits at much lower temperatures because they heat your body directly.
Beginner-friendly: 110–125°F — comfortable, gentle sweat
Standard session: 130–145°F — solid therapeutic range for most people
Maximum heat: 150°F (indoor models) or 170°F (outdoor models)
Key insight: You don't need to max out the temperature to get benefits. Many experienced users prefer the 130–140°F range for longer, more relaxing sessions.
How Often Should I Use My Sauna?
There's no strict limit. Most Peak Sauna customers use their sauna:
3–5 times per week for wellness maintenance
Daily for more intensive health routines
1–2 times per week for casual enjoyment
Consistency matters more than intensity. Regular 30-minute sessions at moderate temperatures deliver more benefit over time than occasional extreme sessions.
Before Your Session
Hydrate
Drink at least 16 oz of water before your session. You're going to sweat — a lot. Going in dehydrated makes the experience less comfortable and less effective.
Light Meal or Empty Stomach
Avoid heavy meals within 1 hour of your session. A light snack is fine. Many people prefer using the sauna on an empty stomach, especially in the morning.
Set Up Your Space
Lay a towel on the bench (absorbs sweat, protects wood)
Have water or electrolytes within reach
Queue up music or a podcast on the built-in Bluetooth speakers
During Your Session
Enter at any temperature — you don't need to wait for max heat. Many customers enter when the sauna reaches 100–110°F and warm up with it.
Breathe normally — the air isn't scorching like a traditional sauna
Stretch gently if you have room — your muscles are warm and pliable
Use the RLT panel — if your model has red light therapy, turn it on for the duration of your session for maximum benefit
After Your Session
Cool Down Gradually
Let your body temperature return to normal naturally. Some people enjoy a cool (not cold) shower. Others simply sit and relax for 5–10 minutes.
Rehydrate
Drink another 16–32 oz of water after your session. Adding electrolytes is a good practice, especially if you had a heavy sweat.
Wipe Down the Bench
Quick towel wipe of the bench and any surfaces where you sweated keeps your sauna fresh.
Leave the Door Open
Let the sauna ventilate for 15–20 minutes after your session to dry out the interior.
When to Avoid Sauna Use
Consult your doctor before using a sauna if you:
Are pregnant
Have cardiovascular conditions
Have very low blood pressure
Are taking medications that affect heat tolerance
Have open wounds
Have been drinking alcohol (dehydration risk)
Still Have Questions?
Everyone's ideal session is a little different. If you're new to infrared saunas and want personalized guidance, reach out at [email protected] or (470) 665-3747.
How Do I Request a Replacement Part for My Sauna?
If a component of your Peak Sauna needs replacing — whether it's a speaker, a heater panel, a floorboard, or anything else — here's how to get it taken care of.
Step 1: Identify the Issue
Before reaching out, gather the following:
Your order number (from your confirmation email)
The model name (Shasta, Fuji, Everest, etc.)
A description of the issue — what's broken, malfunctioning, or damaged?
Photos or a short video — this helps our team diagnose the problem quickly and send the right part the first time
Step 2: Contact Our Support Team
Reach out to us at
Email: [email protected]
Include your order number and the documentation from Step 1. The more detail you provide upfront, the faster we can help
Step 3: Troubleshooting
Our team may walk you through some troubleshooting steps first. Many issues can be resolved without a replacement part — a loose connection, a misaligned sensor, or a simple reset can often fix the problem.
If troubleshooting doesn't solve it, we'll move to a replacement.
Step 4: Replacement Part Shipped
If the issue is covered under warranty (which most are — see our Warranty Guide):
The replacement part ships at no cost to you
Some parts are in stock and ship within days
Others are made to order and may take up to 30 days
We'll provide an estimated timeline when we confirm the replacement
Common Replacement Parts
Here are the parts we most commonly replace:
Speakers — Bluetooth speakers can occasionally develop buzzing or static. We'll ship replacements.
Control panels — If unresponsive after troubleshooting, we replace the full unit (3-year warranty).
Heater panels — Rare, but if an infrared heater fails, it's covered for 5 years.
Door sensors — If the magnetic sensor can't maintain alignment, we'll send a new one.
Cushions and backrests — Made to order, typically 2–4 weeks.
Floorboards — If damaged or cracked, we'll send a replacement with the next batch shipment.
Light fixtures — LED lights occasionally need replacing (1-year warranty).
Glass door panels — If cracked or chipped, we'll ship a replacement.
Installing Replacement Parts
Most replacement parts can be installed yourself using the same clasp and plug system as the original assembly. Our team will provide specific instructions for your replacement, and in most cases, it's a straightforward swap.
If a technician is needed (within the 1-year labor warranty), we'll coordinate that for you.
Out of Warranty?
If the part is outside the warranty period, we can still help. We sell replacement parts directly — contact our team for pricing and availability.
Still Have Questions?
We want every part of your sauna working perfectly. If something's not right, don't hesitate to reach out at [email protected] or (470) 665-3747.
What Is the Peak Wellness Club?
You may have heard about the Peak Wellness Club after purchasing your sauna. Here's what it is, what it costs (spoiler: nothing), and how it enhances your sauna ownership experience.
It's Not a Subscription
Let's clear this up right away: the Peak Wellness Club is not a paid subscription and has no monthly fee. You do not need to join or pay anything extra to use your sauna. Every feature and component of your Peak Sauna works fully without any membership.
What Is It?
The Peak Wellness Club is a free community for Peak Sauna owners. It's designed to help you get the most out of your infrared sauna and wellness routine with:
Guided sauna protocols — structured programs for specific wellness goals (recovery, detox, relaxation, skin health)
Daily wellness insights — tips, research summaries, and practical advice
Expert content — articles and videos from wellness professionals
Community connection — connect with other Peak Sauna owners
How to Access
After purchasing your sauna, you'll receive information about joining the Peak Wellness Club via email. It's completely optional — your sauna works beautifully on its own without it.
Why We Built It
We believe owning a sauna is just the beginning. The real value comes from using it consistently and effectively. The Peak Wellness Club exists to help you:
Build a sustainable sauna routine
Understand the science behind infrared therapy and red light therapy
Maximize the health benefits of your investment
Stay motivated with fresh content and community support
Do I Need It to Use My Sauna?
Absolutely not. Your sauna is a standalone product that works right out of the box. The SmartLife app controls your heat and temperature. The Peak Saunas RLT app controls your red light panel (if applicable). Neither requires a Peak Wellness Club membership.
The club is simply an added resource for owners who want to go deeper into the wellness side of sauna use.
Will It Ever Cost Money?
The Peak Wellness Club is currently free for all Peak Sauna owners. If we ever introduce premium content tiers in the future, the core club membership will remain free.
Still Have Questions?
If you received an email about the Peak Wellness Club and weren't sure what it was, we hope this clears things up. For any questions, contact us at [email protected] or (470) 665-3747.
Can a Sauna Help My Health Condition?
We frequently hear from customers managing chronic illness, pain, detox protocols, or recovery who are hoping infrared sauna therapy can help. We want to give you an honest, helpful answer.
What Infrared Sauna Therapy Can Support
Research and clinical experience suggest that regular infrared sauna use may support:
Detoxification — sweating is one of the body's primary detox pathways; infrared heat penetrates deeper and induces more sweat than traditional saunas
Chronic pain and inflammation — near-infrared and far-infrared wavelengths have been studied for musculoskeletal pain, arthritis, and fibromyalgia
Cardiovascular health — passive heating mimics cardiovascular exercise effects (heart rate elevation, improved circulation)
Skin health — red light therapy (660nm / 850nm) supports collagen production and skin repair
Mental wellness — heat stress triggers endorphin release; many users report improved mood and sleep
Muscle recovery — post-workout inflammation and soreness
Specific Conditions We're Often Asked About
Heavy Metal / Toxin Detoxification
Far and full spectrum infrared saunas support deep sweating, which research suggests helps the body excrete heavy metals (mercury, lead, cadmium) and environmental toxins through sweat. This is why infrared saunas are often incorporated into integrative detox protocols.
Gadolinium Toxicity / MRI Contrast Agents
Several integrative practitioners have used infrared sauna as part of Gadolinium Deposition Disease (GDD) protocols, with the rationale that enhanced sweating may support toxin elimination. We are not medical professionals and cannot make treatment claims. If you or a loved one is dealing with GDD, please consult with an integrative physician or specialist experienced with heavy metal / contrast agent detox protocols before beginning sauna use.
Chronic Illness (Lyme, Autoimmune, Fibromyalgia, etc.)
Many customers with chronic illness use our saunas as a component of their wellness routine. Infrared sauna is generally considered gentle enough for these populations at moderate temperatures (110–130°F) and short sessions (15–20 minutes). Start low and slow. Always check with your care team first.
Chiari Malformation / Neurological Conditions
Individuals with Chiari Malformation or other neurological conditions should consult their neurologist before using infrared sauna. Heat sensitivity varies significantly. If approved, starting at lower temperatures and shorter sessions is recommended.
Important Safety Notes
Start low and slow — especially with any health condition. Begin at 110–120°F for 15 minutes and work up gradually.
Hydrate before and after — drink 16–24 oz of water or electrolyte drink before each session.
Consult your doctor — we always recommend speaking with your healthcare provider before starting any new wellness protocol, especially if you have a medical condition or take medication.
Not a substitute for medical treatment — infrared sauna is a wellness tool, not a cure or treatment for any disease.
How Our Team Responds to Health Inquiries
When a customer shares a personal health story, our team responds with empathy first. We'll provide general information about infrared therapy, encourage consultation with their care team, and offer to answer any specific product questions.
We never make promises about medical outcomes — but we genuinely care about helping people feel better.
More Resources
Questions? Reach us at [email protected] or (470) 665-3747.
Can I Use a Sauna and Cold Plunge Together? (Contrast Therapy Guide)
Short answer: Yes — and it's one of the most powerful things you can do for recovery. Here's how to do it right.
What is contrast therapy?
Contrast therapy (also called hot-cold therapy) is the practice of alternating between heat (sauna) and cold (cold plunge, ice bath, or cold shower). The practice has roots in Nordic wellness traditions and is now backed by a growing body of research on cardiovascular health, recovery, and stress reduction.
How does it work?
In the sauna: Heat causes blood vessels to dilate, increasing circulation throughout the body. Your heart rate rises (similar to moderate aerobic exercise), growth hormone spikes, and your body enters a parasympathetic (rest-and-recover) state. Endorphins and BDNF are released.
In the cold plunge: Cold causes rapid vasoconstriction — blood vessels tighten, blood is shunted to the core, and your sympathetic nervous system activates. Adrenaline and noradrenaline surge. You feel alert and energized.
Alternating between the two creates a "vascular workout" — your blood vessels are forced to repeatedly dilate and constrict, which supports cardiovascular health and creates an endorphin release more intense than either modality alone.
The recommended protocol
For recovery (most common):
Sauna: 20–30 minutes at 120–150°F
Cold plunge: 3–5 minutes (or cold shower: 2–3 minutes)
Rest: 5 minutes
Repeat 2–3 rounds
Finish with cold if you need to stay alert (e.g., before work) Finish with heat if you want to wind down (e.g., before sleep)
Important notes
Start slowly. If you're new to either modality, acclimate first. Don't jump into contrast therapy on day one.
Stay hydrated. Both heat and cold stress the body — drink water before, during, and after.
Listen to your body. Feeling dizzy or lightheaded? End the session immediately.
Avoid immediately after hard strength training if muscle growth is your primary goal — cold right after lifting may blunt hypertrophy signals. Wait 1–2 hours post-workout instead.
Do I need a cold plunge tub?
A cold shower works fine to start. Ideally you want water temperature below 60°F (15°C) for meaningful cold stress, which is difficult to achieve with a shower in summer months. A dedicated cold plunge tub allows more precise temperature control.
Peak Saunas saunas pair well with any cold plunge setup. If you're considering adding contrast therapy to your routine, contact us — we're happy to help you design a home wellness setup that fits your space and budget.
Last updated: March 2026 Category: Sauna Usage & Health Benefits
All Peak signature models come with the full spectrum red light panel.
Some of our more affordable options like the crown, olympus, and aspen come with a smaller red light panel (not the full spectrum medical grade one) and are priced more affordably.
Partnership & Collaboration Inquiries — Peak Saunas
We receive many partnership inquiries — from fitness studios, wellness centers, content creators, corporate wellness programs, and event organizers. We appreciate your interest in working with Peak Saunas!
How to Reach the Right Person
All partnership, collaboration, and sponsorship inquiries go to our Content Partnerships team:
Email: [email protected]
Response time: 3–5 business days
Please include in your email:
Your name and organization
Type of partnership you have in mind (co-branding, wholesale, affiliate, event, content, etc.)
Audience size or reach (if applicable)
Proposed timeline or next steps
What We Consider
We evaluate partnerships based on:
Alignment with our wellness-focused brand values
Audience fit (health, fitness, longevity, home improvement)
Mutual benefit and fair terms
Exclusivity and competitive considerations
Current Partnership Programs
Affiliate Program — Earn commission on referred sales. Ask about our affiliate rates.
Commercial/Group Orders — Gyms, spas, and wellness facilities can receive volume pricing.
Content Collaborations — Sponsored content, product reviews, and podcast features.
Not Sure Which Category Fits?
Just email [email protected] with a brief description of your idea. We'll route it to the right person.
For customer support, product questions, or order issues, please contact [email protected] instead.
All Peak Saunas models use shielded electrical components and average about 3 mG (milligauss) inside the sauna. The design is the same across the lineup, indoor and outdoor. The XL red light panel also averages about 3 mG.
My EMF meter shows a higher reading. Is something wrong?
Readings change with the meter type and how close you hold it to the heaters and control panel. If your readings are far above this at seated position, email [email protected] with your meter model and photos of the readings.
Shipping & Refunds
Orders may be cancelled at any time before they enter the “Shipped” stage for a 5% cancellation fee.
Once an order has shipped, it is subject to the return policy and applicable restocking fees.
Made-to-order and custom-made items (including Dundalk Leisurecraft products) cannot be cancelled or returned once production has begun or once shipped.
To request a cancellation:
Email [email protected] or call +1 (470) 665-3747.
Include your order number and request a cancellation.
Our team will respond within 24 hours.
Our standard shipping time within the US is 5 - 11 business days if your sauna is in stock. Please note that delivery times may vary depending on your location and the time of year.
For additional questions about our shipping policy, please contact us at [email protected] or call +1 (470) 665-3747.
If your product arrives damaged:
If the box shows visible damage, take clear photos, refuse delivery, and note the damage with the driver on the Bill of Lading or Freight Bill.
If no damage is visible on the box, inspect your order immediately after delivery. If you discover damage, take photos or videos and email us right away at [email protected].
All damage must be reported within 48 hours of delivery. Claims made after 48 hours cannot be honored.
Our team will assist you in processing a replacement unit.
General Rules for Exchanges
Must be requested within 30 days of delivery.
Exchanges are accepted only for unused, uninstalled products in original packaging with the box and pallet.
A 25% restocking fee will apply to all exchanges.
If a product has been used or installed (except for Peak Saunas under the trial policy), it cannot be exchanged.
How We Process Exchanges
You arrange and pay for return shipping of the product(s) to be exchanged.
Our warehouse inspects the returned product to confirm it’s in new condition.
We issue a refund, less the restocking fee.
You may place a new order for the desired product.
Refunds
We’ll notify you once we’ve received and inspected your return. If approved, your refund will be issued to your original payment method within 7 to 10 business days.
We want you to be completely confident in your purchase. Here's everything you need to know about cancellations, returns, and refunds.
CANCELLING YOUR ORDER
Before Your Order Ships / Pre-Order
If your sauna has not yet shipped or is a pre-order, you can cancel for a refund. Simply email [email protected] or reply to your order confirmation with your order number and the reason for cancellation. All cancellations will be subject to a 5% cancellation fee.
We'll process the cancellation and issue a full refund within 3–5 business days.
After Your Order Ships
If your order has already shipped or is a pre-order that has left our warehouse, please contact us immediately at [email protected]. We'll review on a case-by-case basis.
Important for pre-orders: If your sauna hasn't yet arrived at our warehouse, cancellations are generally accepted. Once it has shipped, return shipping costs apply.
RETURNS
Changed your mind after delivery? We offer a 30-day return window from the date of delivery.
To initiate a return:
1. Email [email protected] with your order number and reason for return
2. Our team will confirm eligibility and provide return instructions
3. You are responsible for return shipping costs (freight return — typically $200–$500 depending on your location) as well as a 25% restocking fee.
4. Sauna must be returned in original, unassembled condition
We cannot accept returns for:
- Assembled or used saunas (unless defective)
- Saunas damaged after delivery
REFUNDS
Once your return is received and inspected, we'll process your refund within 5–7 business days.
Refunds are issued to your original payment method (credit/debit card, PayPal, etc.). We do not issue refunds by check.
Refund Timeline by Payment Method:
- Credit / Debit Card: 3–5 business days after processing
- PayPal: 1–3 business days after processing
- Financing (Affirm/Klarna): Per provider — usually 5–10 days
WARRANTY VS. RETURN
If your sauna arrived damaged or has a defect, that's handled under our warranty — not as a return. You may be entitled to free replacement parts or a full replacement unit. See our Warranty & Replacement Parts article for details.
Questions? Email [email protected] with your order number. Our team responds within 1-2 business days.
If you need to cancel your Peak Saunas order, here's exactly what to do and what to expect.
WHEN CAN I CANCEL?
- Before shipping: Full refund issued to your original payment method within 5–7 business days.
- After shipping / in transit: Contact us immediately. We'll work with you but cancellation may not be possible until delivery is refused or a return is arranged.
- After delivery: See our Return Policy.
HOW TO CANCEL
1. Email [email protected] with your order number and reason for cancellation.
2. Our team will confirm cancellation within 1-2 business days.
3. Refund is processed within 5–7 business days back to your original payment method.
WHAT ABOUT LEAD TIMES?
If you're concerned about lead time before ordering, our current estimated production and shipping timelines are listed on each product page. You're welcome to contact us before placing an order to confirm current timelines.
Questions? Email [email protected] or use our live chat.
After placing your order, here's what to expect and how to check on your order status.
TYPICAL TIMELINE
- Order confirmation: Immediate email after purchase.
- Production & preparation: If your order was placed on pre-order it may take several weeks — we'll email you when your sauna is ready to ship.
- Shipping notification: Once the order leaves our warehouse, you'll receive a shipping email with freight carrier details and tracking info.
- Delivery: Freight carriers typically contact you to schedule a delivery appointment.
HOW TO TRACK YOUR ORDER
1. Check your shipping confirmation email for the carrier name and tracking number.
2. Visit the carrier's website and enter your tracking number.
3. The carrier will contact you directly to arrange a delivery window.
HAVEN'T HEARD FROM US?
If it's been longer than expected since your order and you haven't received a shipping update, reach out at [email protected] with your order number.
FREIGHT DELIVERY — WHAT TO EXPECT
- Freight deliveries require someone to be home.
- Inspect packaging before signing. Note any damage on the delivery receipt.
- Contact us within 48 hours if you notice damage.
Saunas ship via freight (LTL) on a flatbed or box truck. Here's exactly what happens and what you need to know before your delivery day.
HOW DOES FREIGHT DELIVERY WORK?
Your sauna ships in a large wooden crate via a freight carrier. A few days before delivery, the carrier will call or email you to schedule a specific delivery window (usually a 4-hour window).
WILL THE TRUCK FIT ON MY STREET / IN MY NEIGHBORHOOD?
In most cases, yes — and we work hard to make sure it does. Our freight broker uses residential-friendly carriers who use appropriately-sized trucks for neighborhood deliveries. If you have a narrow street, HOA, or gated community, just let us know in advance and we'll coordinate with the carrier.
Just contact us at [email protected] with your address and any access concerns and we'll confirm the delivery setup before the truck leaves the warehouse.
WILL THEY DELIVER TO MY GARAGE?
Standard freight delivery is curbside — the driver will bring the crate to the edge of the truck. However, in many cases carriers can accommodate garage delivery or closer placement. Let us know your preference when we reach out to schedule.
If you need white-glove delivery (inside your home or garage), contact us — we can arrange this for an additional fee in most areas.
WHAT DO I NEED TO DO ON DELIVERY DAY?
1. Be present — someone 18+ must be there to sign for the delivery
2. Inspect the crate before signing — look for visible damage to the exterior
3. Note any damage on the delivery receipt before the driver leaves (this is critical for any freight claims)
4. Take photos of the crate before and after opening
WHAT IF MY DELIVERY WINDOW DOESN'T WORK?
Call or email the freight carrier directly (they'll provide contact info when scheduling) to reschedule. You can also reach us at [email protected] and we'll assist.
HOW LONG DOES SHIPPING TAKE?
Typical transit time is 5–14 business days after your order ships. You'll receive a tracking number by email once your order leaves the warehouse.
Questions before your delivery? Contact us at [email protected] — we're happy to walk through any logistics concerns before delivery day.
One of the most common questions we get — and for good reason. You're excited about your new sauna and want to know exactly when it'll arrive. Here's the full breakdown.
In-Stock Models: 5–7 Business Days to Ship
If the model you ordered is currently in stock, it typically ships within 1-3 business days from our warehouse. Once shipped, transit time depends on your location but is generally 5–10 business days via freight carrier.
Pre-Order Models: Batch-Based Delivery
Many of our most popular models — including the Fuji, Everest, Rainier, Patagonia, Denali, Matterhorn, Kilimanjaro, and El Capitan — ship in batches. If they are on pre order, when you place a pre-order, you're securing your spot in the next available batch!
What to expect with pre-orders:
Full payment is required at time of order (no deposits). With demand high for these models, we have a hard time keeping them in stock and so do require the cost up front to reserve your spot in line!
You'll receive email updates as your batch approaches
Typical wait times vary by model and demand — our team will keep you informed
Batches frequently sell out before arrival, so placing your order early is the best way to secure your spot
How Does Delivery Work?
All Peak Saunas ship via freight carrier with free curbside delivery to your driveway or ground-level entrance. Here's what that means:
Your sauna arrives on a standard freight truck (typically a 53-foot trailer or smaller box truck depending on your area)
The carrier will contact you to schedule a delivery window
Delivery is to the curb or driveway — the driver will not bring the sauna inside your home
We recommend having 2 (or more depending on the model) adults available to move the packaged panels from the delivery area to your assembly location
Tracking Your Order
Once your sauna ships, you'll automatically receive a shipping confirmation email with tracking information. If you haven't received an update and want to check in, our support team is always happy to help.
Tips for a Smooth Delivery
Confirm your shipping address is correct at time of purchase
Make sure your delivery area is accessible — if you're on a private road or narrow street, let us know so we can coordinate with the carrier
Have a plan for moving the panels — while each panel is manageable, having a helper makes assembly day go faster
Clear space in the room where you'll assemble your sauna before delivery day
Still Have Questions?
Our support team is here to help with any shipping or delivery questions. Reach out anytime at [email protected] or call us at (470) 665-3747.
All Peak Saunas ship for free via freight carrier with curbside delivery. If you've never received a freight shipment before, here's everything you need to know to make delivery day smooth.
What "Curbside Delivery" Means
Your sauna will be delivered to the curb, driveway, or ground-level entrance of your property (like an accessible garage). The freight driver will use a liftgate to lower the packaged sauna from the truck, but they will not bring it inside your home or to a specific room.
You'll need to arrange to move the panels from the delivery point to your assembly location.
What Kind of Truck Comes?
Freight deliveries typically arrive on a standard 53-foot tractor-trailer or, in some residential areas, a smaller box truck. The carrier will do their best to accommodate your location.
If You Have Access Concerns
Let us know before your sauna ships if:
You're on a private or narrow road where a large truck can't turn around
Your driveway is steep, unpaved, or gated
There are low-hanging trees or wires that could restrict a tall truck
You live in a cul-de-sac or area with tight turns
We can often coordinate with the carrier to use a smaller vehicle or arrange an alternative delivery plan. The earlier we know, the easier it is to solve.
Scheduling Your Delivery
Once your sauna ships, the freight carrier will contact you directly to schedule a delivery window. Here's what to expect:
Tracking information — you'll receive this via email once the sauna leaves our warehouse
Carrier call/email — the freight company will reach out to schedule your delivery date and time window
Delivery day — be available during your scheduled window to sign for and inspect the shipment
How to Inspect Your Delivery
This is important: inspect your shipment before the driver leaves. Here's what to look for:
Count all boxes/pallets against your packing slip
Check for visible damage to the exterior packaging (dents, holes, water stains)
If there's damage, note it on the delivery receipt before signing and take photos immediately
Report any damage to our support team within 48 hours at [email protected]
Documenting damage at delivery makes the claims process much faster if anything needs to be replaced.
Moving the Sauna Inside
Each sauna ships as multiple flat panels rather than one giant assembled unit. Individual panels are manageable for two adults. Here are some tips:
Have 2 adults ready on delivery day
Clear a path from the curb to your assembly location in advance
Use furniture dollies or moving blankets to protect your floors
Don't drag panels — carry or dolly them to prevent scratches
For outdoor models (Patagonia, Kilimanjaro, El Capitan), which are heavier, we recommend 3 adults for moving panels.
Still Have Questions?
Freight delivery is straightforward once you know what to expect. If you have questions about your specific delivery situation, contact us at [email protected] or (470) 665-3747 — we're happy to coordinate with the carrier on your behalf.
What Is Peak Saunas' Return and Refund Policy?
We want you to love your Peak Sauna. If for any reason you're not satisfied, here's everything you need to know about our return process:
30-Day Return Window
You have 30 days from the date of delivery to initiate a return. The sauna will need to be unassembled (if previously assembled) — and it does need to be in its original condition without modifications or damage beyond normal assembly.
How to Start a Return
Contact our support team at [email protected] or (470) 665-3747
Provide your order number and reason for the return
Our team will coordinate the return logistics, including arranging freight pickup
Return Costs
Customer pays return shipping — since saunas ship via freight, return shipping costs vary by location but typically range from $200–$500
25% restocking fee applies to all returns - if the order has been unpackaged and assembled
After shipping and restocking, the effective refund is approximately 70–75% of the purchase price
We're transparent about these costs upfront because we want you to make an informed decision.
Refund Processing
Once we receive your returned sauna and inspect it at our warehouse:
Refunds are processed back to your original payment method
Processing typically takes 5–10 business days after inspection
You'll receive email confirmation when the refund is issued
Order Cancellations
If your sauna hasn't shipped yet, cancellation is simpler:
A 5% cancellation fee applies
A 5% credit will also be available to a future Peak Saunas purchase
No return shipping costs since the sauna hasn't left the warehouse
Refund is processed to your original payment method
Damaged or Defective Items
If your sauna arrives damaged or has a manufacturing defect, our standard return policy does not apply — this falls under our warranty. Contact us immediately with photos and your order number, and we'll arrange repairs or replacements at no cost to you.
See our Warranty Guide for full details on coverage.
Exchanges
Want a different model instead of a refund? We can often arrange an exchange. The restocking fee may be waived or reduced for exchanges — contact our team to discuss your options.
Still Have Questions?
We know returns aren't fun, but we try to make the process as straightforward as possible. Reach out to us at [email protected] or (470) 665-3747.
My Sauna Arrived Damaged — What Should I Do?
We're sorry to hear about any damage to your sauna. We pack every unit with care, but freight shipping can be rough. Here's exactly what to do to get the issue resolved quickly:
Step 1: Document Everything
As soon as you notice damage — whether at delivery or during assembly — take action:
Photograph all damage clearly from multiple angles
Take photos of the packaging too (damaged boxes, dents in the crate, etc.)
Record a short video if the issue is hard to capture in photos (flickering lights, heater not turning on, etc.)
Keep all packaging materials until the issue is fully resolved
The more documentation you provide, the faster we can assess and resolve the problem.
Step 2: Note Damage at Delivery
If you notice damage when the freight driver is still there:
Write "damaged" on the delivery receipt before signing
Note the specific damage (e.g., "dent in box #2" or "visible crack in glass panel")
This documentation is critical for freight claims
If you've already signed and the driver has left, that's okay — we can still help. Just contact us as soon as possible.
Step 3: Contact Our Support Team
Reach out to us within 48 hours of delivery at:
Email: [email protected]
Text: (470) 665-3747
Include:
Your order number
Photos/videos of the damage
A description of what's affected
What Happens Next
Our team will review your documentation and determine the best resolution:
Minor Cosmetic Damage
For scratches, small dents, or imperfections that don't affect function, we may offer a credit or discount on your order as compensation.
Damaged Components
If specific parts are damaged (a panel, the control box, speakers, a heater panel), we'll ship replacement parts at no cost to you. Some parts are made-to-order and may take up to 30 days.
Major Damage
In rare cases where the sauna is significantly damaged, we'll arrange for a full replacement or return and refund at our expense.
Common Damage Issues We See
Scratches on wood panels — sometimes caused during shipping or from packaging materials. We have a wood repair kit to help remedy these scuffs and scratches
Protective film not removed properly — if the film is stuck, use a hair dryer on medium heat held 4–6 inches away, moving slowly. The heat softens the adhesive and makes removal easy.
Screws or nails pushing through exterior panels — contact us for assessment; this may require a replacement panel
Cracked glass door — we'll send a replacement glass panel
Damaged infrared heater panel — we'll ship a replacement
Protective Film Removal Tip
Many customers mistake stuck protective film for damage. All sauna panels ship with a thin plastic film to prevent scratches during transit. If it's not peeling off easily:
Set a hair dryer to medium or high heat
Hold it 4–6 inches from the film
Move slowly back and forth for 15–30 seconds
The film should peel away easily once warm
Still Have Questions?
We stand behind the quality of our saunas and want you to be thrilled with your purchase. If something's not right, we'll make it right. Contact us at [email protected] or (470) 665-3747.
Currently Peak Saunas is only shipping to the 48 continuous US states
Freight Delivery: Scheduling & What to Expect
Your Peak Sauna ships via freight carrier (usually CEVA Logistics or Daylight Transportation) because of its size and weight. Here's everything you need to know about your delivery.
How Freight Delivery Works
Unlike standard package delivery, freight shipments require scheduled delivery appointments. This ensures someone is home to receive your sauna.
The Delivery Process
Shipping notification — You'll receive tracking info when your sauna ships
Carrier contact — The freight company will call or email to schedule delivery
Appointment confirmation — You'll agree on a date and time window
Delivery day — The driver delivers to your driveway/curb (standard)
Scheduling Your Delivery
When the Carrier Contacts You
CEVA or FedEx will reach out 1-3 days before your sauna arrives in your local area. They'll call the phone number on your order.
Tip: Save these numbers so you recognize the call:
CEVA Logistics: Various local numbers, often starts with 800
FedEx Freight: 1-800-463-3339
If You Miss the Call
Don't worry! You can:
Call the carrier directly using the number on your tracking email
Many carriers offer online scheduling through their tracking portal
Contact us at [email protected] and we'll coordinate for you
Rescheduling a Delivery
If your scheduled date no longer works:
Contact the carrier directly at least 24 hours before delivery
Request a new appointment window
There's typically no fee for one reschedule
What not to do:
Nothing. This may lead to additional costs from a missed delivery!
Delivery Options
Curbside Delivery (Standard — Free)
Your sauna arrives on a pallet and is delivered to:
Your driveway
Garage entrance
Building loading dock
You are responsible for:
Moving the pallet/boxes from the delivery point
Having help available (sauna boxes can weigh 200-400 lbs)
Breaking down and disposing of packaging
What to Do on Delivery Day
Before the Truck Arrives
Clear a path from the delivery point to your assembly location
Have 1-2 helpers available for moving heavy boxes
Keep your phone nearby — drivers often call when close
When the Driver Arrives
Inspect the packaging before signing
Note any visible damage on the delivery receipt (write "damaged" next to your signature)
Take photos of all boxes before opening
Count the number of boxes against your packing slip
If You Notice Damage
Visible damage on arrival:
Note it on the delivery receipt
Take photos immediately
Accept the delivery (refusing may delay your replacement)
Email [email protected] within 48 hours with photos
Hidden damage (discovered during unpacking):
Take photos of the damage and packaging
Email support within 7 days of delivery
We'll send replacement parts at no charge
Need Help with Your Delivery?
Contact us at [email protected] with:
Your order number
Tracking number (if available)
Description of the issue
We'll work directly with the carrier to resolve any problems.
Can I track my sauna in real-time?
Freight tracking is less precise than package tracking. You'll see major checkpoints (shipped, in transit, out for delivery) but not real-time GPS.
What if no one is home for delivery?
Freight requires a signature. The carrier will reschedule if no one is present. After 1-2 missed attempts, storage fees & additional fees may apply.
Can I request a specific time?
Carriers offer time windows (morning, afternoon) but cannot guarantee exact times.
How long does shipping take?
In-stock orders ship within 2-4 business days and typically arrive within 7-10 business days total (varies by location). See our Order Journey guide for the full timeline.
What To Do If Your Delivery Is Missed or Rescheduled
Sometimes freight deliveries don't go as planned. Here's what to do if your driver doesn't show up or your delivery gets rescheduled without notice.
If the Driver Didn't Show Up
Step 1: Confirm Your Appointment
Check your email or text confirmations to verify:
The scheduled date and time window
The carrier contact information
Your tracking number
Step 2: Contact the Carrier Directly
Call the freight carrier using the number from your tracking email
Ask them:
"I had a delivery scheduled for [date/time]. Can you tell me the status?"
"When can this be rescheduled?"
Step 3: Contact Peak Saunas Support
If you can't reach the carrier or aren't getting resolution:
Email [email protected] with your order number
Include the scheduled delivery date and what happened
We'll escalate directly with the carrier on your behalf
If Your Delivery Was Rescheduled Without Notice
This shouldn't happen, but sometimes carriers reschedule due to:
Route changes
Driver availability
Weather or road conditions
What To Do:
Check your spam folder — Carrier notifications sometimes get filtered
Call the carrier to find out why and get a new appointment
Contact us if you need help rescheduling or if this is causing hardship
Your Rights
Carriers should give 24+ hours notice for schedule changes
You should not be charged for carrier-initiated reschedules
If storage fees are mentioned due to carrier error, contact us immediately
How to Prevent Future Issues
Save the carrier's phone number when you get tracking info
Provide a cell phone number that you check regularly
Ask for both call AND text/email confirmation
We're Here to Help
Delivery issues are frustrating. Email [email protected] with:
Your order number
What happened
Your preferred contact method
We'll work with the carrier to make it right.
Assembly Instructions
1. Remove the unit from its packaging
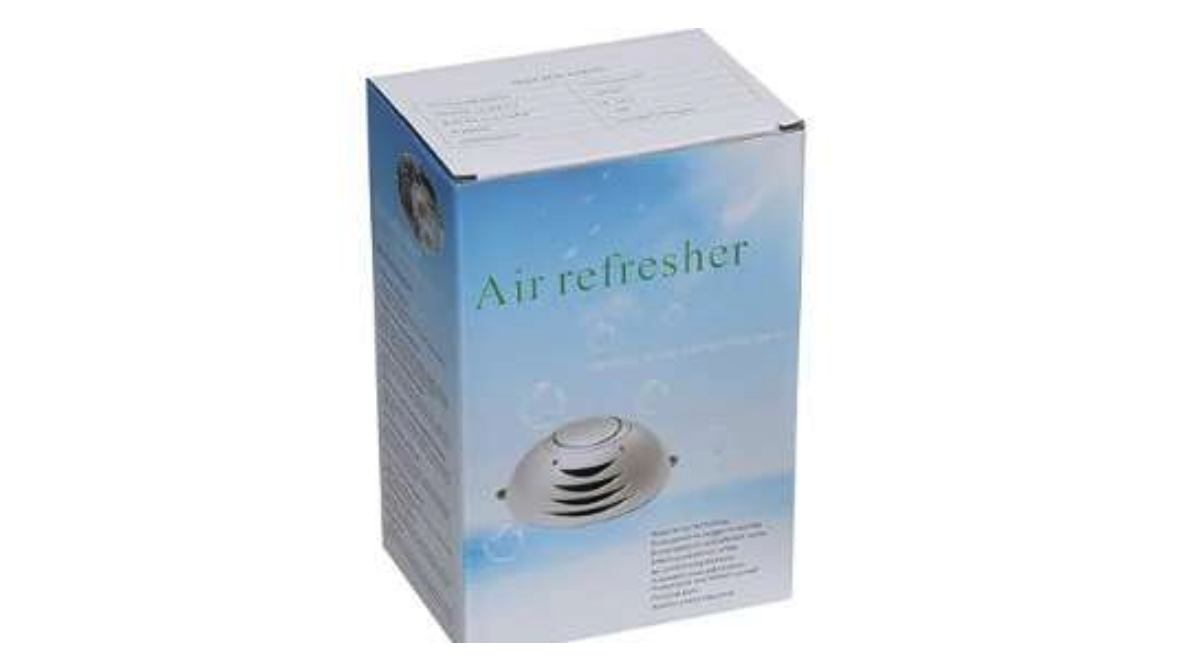
2. Open the silver package to remove the Oxygen Pad — the small yellow square. Do not discard it.
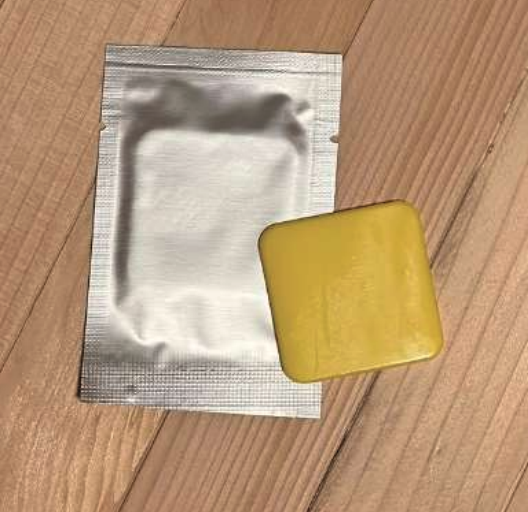
3. Insert the Oxygen pad into the back of the ionizer
Rotate the back of the ionizer to open the compartment, insert the pad, then close the compartment.
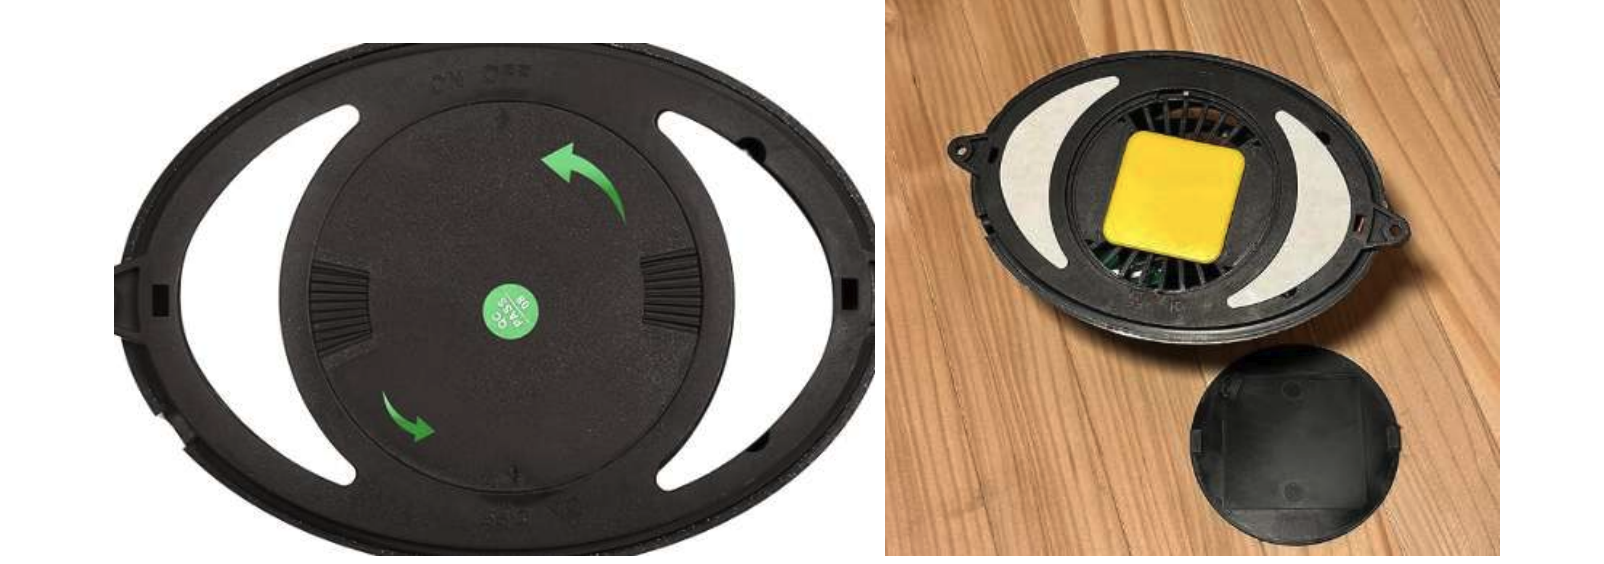
4. Locate the power cord hanging in the sauna and plug it into the ionizer
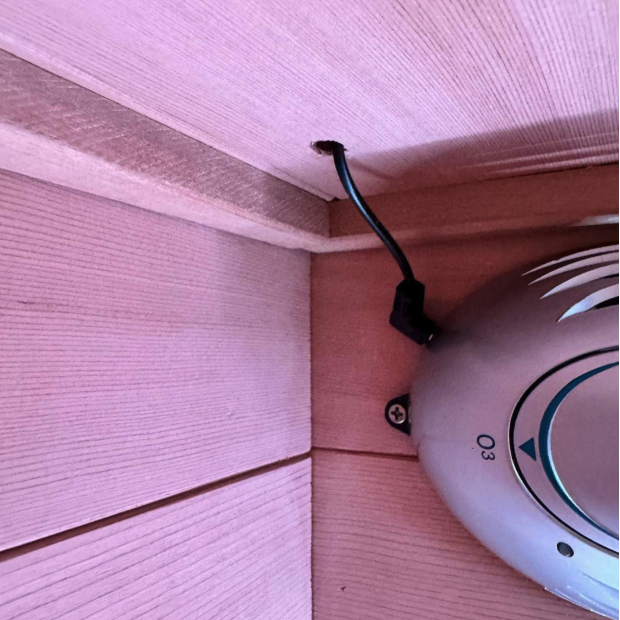
5. Secure the ionizer
Secure the ionizer to the wall with the provided screws (found in the main pack of screws, not in the ioinizer box). Sticky pads may also be used, but the heat can cause the adhesive to loosen over time.
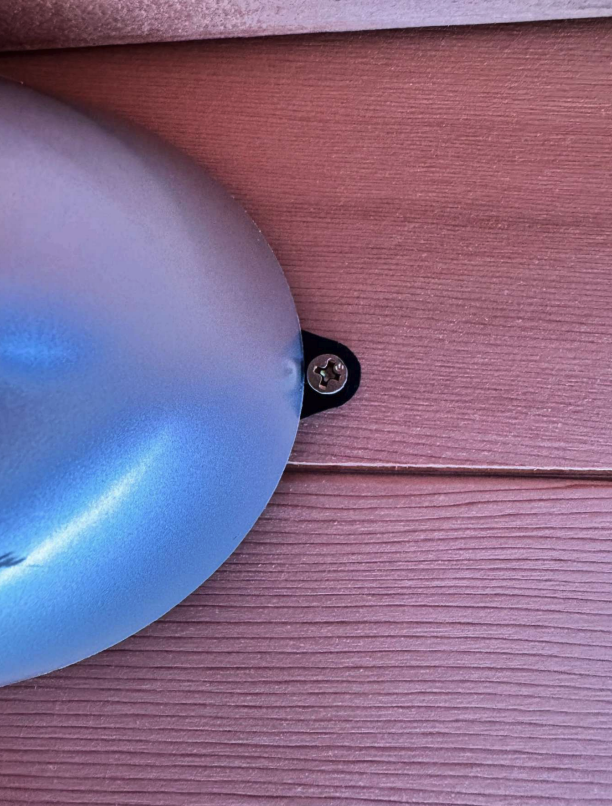
For the outdoor Patagonia & Kilimanjaro units, the roof assembly will slightly vary from indoor units.
There are brackets included with the unit as well as pre-drilled holes on the panels, but no pre-drilled holes on the roof.
Due to a common issue of the holes not aligning and to protect the integrity of the sauna, we now only include holes in the panels for guidance on where to place the brackets. From there you can drill directly into the roof to attach it to the sauna.
For further clarification, please reach out to [email protected].
Good news — assembling your Peak Sauna is straightforward and most models don't require any tools. Our saunas use a clasp-together panel system designed for easy setup.
What You'll Need
For 1-3 Person models: 2 adults (one to hold panels, one to clasp them together)
For larger models: 2+ adults highly recommended
A clear space slightly larger than the sauna's footprint
Minimal tools required — all connections are built into the panels
That's it.
Step-by-Step Overview
1. Unbox and Organize
Carefully remove all panels and components from the packaging. Lay them out and identify each piece using your owner's manual. Keep the protective film on until assembly is complete to avoid scratches.
2. Start with the Floor
Place the floor panel in your desired location. Make sure the surface is level — your sauna can sit directly on carpet, hardwood, tile, or concrete. No special floor preparation needed.
3. Assemble the Walls
Starting with the back wall, stand each panel upright and clasp it to the floor panel. Work your way around — side panels connect to the back wall and to the floor using the built-in clasp system.
4. Install the Bench(es)
Slide the bench assembly into position. It rests on integrated support brackets — no hardware needed.
5. Attach the Roof
With all walls secure, carefully lift the roof panel into place. It clasps onto the top edges of the wall panels.
7. Connect Power and Accessories
Plug in the internal wiring harnesses — these connect the heater panels, control panel, speakers, and lighting. Then connect the main power cord to your outlet.
8. Remove Protective Film
Once everything is assembled, peel off any remaining protective film from the wood panels and glass door.
Assembly Videos
We have step-by-step assembly videos available on our YouTube channel for each model. Your owner's manual also includes detailed diagrams. You can download manuals at: peaksaunas.com/pages/download-peak-saunas-owners-manuals
Common Assembly Tips
Don't force anything. If a panel isn't clasping easily, check that it's oriented correctly.
Watch the cables. When connecting wall panels, make sure internal wiring isn't pinched between panels.
Leave 2–4 inches of space between your sauna and any wall for ventilation.
Protective film on the exterior of outdoor models should remain in place — use a hair dryer on low heat to remove any stubborn film.
Outdoor Models: Additional Considerations
The Patagonia, Kilimanjaro, and El Capitan are heavier and may require 3 adults for assembly. These models also weigh significantly more (695–1,031 lbs), so plan your assembly location carefully — moving an assembled outdoor sauna is not practical.
Still Have Questions?
Assembly should be simple and even a little fun. But if you hit a snag, we're here to help. Contact us at [email protected] or (470) 665-3747 — photos and videos of any issues help us troubleshoot faster.
Reporting a Manufacturing Defect
For issues that aren't related to shipping damage
What's a Manufacturing Defect?
Manufacturing defects are quality issues that originated during production, not from shipping. Examples include:
Glass imperfections: Scratches or marks inside the glass (not surface scratches)
Wood blemishes: Cracks, knots, or finish issues present before assembly
Component issues: Parts that don't fit correctly or are missing features
Electrical problems: Wiring issues discovered during setup
How to Report a Defect
Step 1: Document the Issue
Take clear photos or video showing:
The defect up close
The defect in context (wider shot showing location)
Any labels or serial numbers visible nearby
Step 2: Contact Support
Email [email protected] with:
Your order number
Sauna model
Description of the defect
Photos/video attached
Whether the sauna is assembled or not
Step 3: We'll Assess & Resolve
Our team will:
Review your documentation
Determine if it's a manufacturing defect vs. shipping damage
Provide resolution options (replacement part, repair, exchange)
Manufacturing Defect vs. Shipping Damage
Manufacturing Defect | Shipping Damage |
|---|---|
Scratches inside glass | Cracked or shattered glass |
Warped panels (no impact marks) | Dents, punctures, crushed areas |
Missing pre-installed components | Missing boxes from shipment |
Finish applied incorrectly | Scratches on exterior surfaces |
Electrical issue at first power-on | Visible impact damage to unit |
Why it matters: Manufacturing defects are always covered under warranty. Shipping damage may involve carrier claims.
What to Expect
Response time: Within 24-48 hours
Resolution: We prioritize getting you a working, beautiful sauna
Replacement parts: Shipped at no charge for confirmed defects
Full unit issues: We'll work with you on exchange if defect is significant
Before You Assemble
If you notice a potential defect before assembly:
Stop and document it
Contact us before proceeding
This helps us assess whether to proceed or replace
Found a defect? Email [email protected] with photos — we'll make it right
Assembly Instructions & Manual Downloads
Category: Technical Support
Your Peak Sauna was designed for easy DIY assembly — most customers complete setup in just a few hours with basic tools.
Where to Find Your Manual
Shipped with Your Sauna
Your assembly manual and operation guide are not included in the packaging. Heres how you can find it:
Sent in confirmation email
Welcome box
On our website
What's Included in Your Shipment
Standard Infrared Sauna Package
Pre-assembled wall panels (4-6 depending on model)
Floor panel with heaters pre-installed
Roof panel(s)
Glass door with handle and hinges
Bench(es) and backrest(s)
Control panel (pre-wired)
Power cord
Hardware kit (screws, clips, brackets)
Assembly manual and operation guide
Accessory kit (varies by model)
If You Ordered Red Light Therapy
Red light panel(s) with mounting hardware
Separate power cord for RLT panel
RLT operation guide
Assembly Overview
Before You Begin
Choose your location — level floor, within reach of appropriate outlet
Clear the area — you'll need space to lay out panels
Have these tools ready:
Phillips screwdriver
Rubber mallet (helpful but not required)
Level (optional)
General Assembly Steps
Lay out all pieces and verify nothing is damaged
Start with the floor panel — position it where you want the sauna
Attach the back panel to the floor using the buckle clips
Add side panels one at a time, connecting buckles
Install the front panel with door opening
Lower the roof panel onto the assembled walls
Secure all buckle clips and verify stability
Install the bench(es) on the interior brackets
Plug in and test all functions
Model-Specific Notes
240V Models (Denali, Matterhorn, Patagonia, El Capitan):
Require hardwiring by a licensed electrician OR
Use the included NEMA plug (6-20P or L6-30P) with appropriate outlet
CANNOT plug into a standard 120V outlet
Outdoor Models (Patagonia, El Capitan):
Must be placed on a level, solid surface (concrete pad, deck, pavers)
Require weatherproof electrical connection
Consider a cover for extended life
Missing Parts or Damaged Items?
If anything is missing or arrived damaged:
Take photos of the damage and packaging
Email [email protected] within 7 days of delivery
Include your order number and description of the issue
We'll ship replacement parts at no cost
Need Help?
Video Assembly Guides
We're building a library of video assembly guides. Contact support to request one for your specific model.
Professional Assembly
While most customers self-assemble, we can connect you with local installation partners in many areas. Contact us for a quote.
Pro Tip: Take your time during assembly. The panels are designed to fit snugly — don't force anything. If a connection seems difficult, double-check you have the right panels matched up.
Cable Identification Guide for Assembly
Found a mystery cable while assembling your sauna? Here's how to identify what it is and where it connects.
Common Cables You'll Find
Power Supply Cable (Main Power)
What it looks like: Thick black cord, typically 6-10 feet long Connection: Plugs into your wall outlet (120V) or connects to your electrical panel (240V) Location: Comes pre-attached to the sauna's power supply unit
Heater Panel Cables
What they look like: Medium-thickness cables with plug connectors on each end Connection: Connect heater panels to the main control unit Location: Some ship loose in the hardware bag; others are pre-installed
Tip: Match the connector shapes — they're designed to only fit the correct port.
Control Panel Cable (Ribbon Cable)
What it looks like: Flat, wide ribbon-style cable Connection: Connects the control panel display to the main electronics Location: Usually pre-installed; you may need to route it through the wall during assembly
LED Lighting Cables
What they look like: Thin cables, often with small barrel connectors Connection: Connect LED strips to the lighting controller Location: May ship loose; connect after main assembly is complete
Speaker/Audio Cables
What they look like: Thin cables, sometimes with 3.5mm or RCA connectors Connection: Connect Bluetooth module to speakers Location: Ships loose in hardware bag
Grounding Wire (Green or Bare Copper)
What it looks like: Single green wire or bare copper wire Connection: Attaches to grounding point, often on the power supply or frame Location: Important for 240V installations — your electrician will connect this
Cables That Ship Loose vs. Pre-Installed
Typically Pre-Installed:
Main power cord
Control panel ribbon cable
Internal heater wiring
Typically Ship Loose (in hardware bag):
Heater panel extension cables (some models)
LED light connectors
Speaker cables
Grounding wire
Can't Identify a Cable?
Check your assembly manual — there's usually a parts diagram
Take a photo showing the cable and its connectors
Email [email protected] with the photo and your sauna model
We'll identify it and tell you exactly where it goes.
Missing a Cable?
If your parts checklist shows a cable that you can't find:
Double-check all packaging materials
Look inside the sauna walls (some cables are tucked inside)
Contact [email protected] — we'll ship replacements promptly
Important Safety Notes
Never force a connection — if it doesn't fit easily, it's the wrong port
Don't modify cables — cutting or splicing voids your warranty
240V wiring must be done by a licensed electrician
Keep cables away from heater panels — route them along walls, not across heating surfaces
Installing the Fuji Sauna in a Built-In Enclosure or Bathroom
The Fuji is our most popular 2-person indoor model and a great fit for built-in bathroom or dedicated sauna room installations. Here's everything your contractor needs to know.
Fuji Dimensions (Exterior)
Dimension | Measurement |
|---|---|
Width | 47.2" (120 cm) |
Depth | 39.4" (100 cm) |
Height | 75.6" (192 cm) |
Clearance requirements:
Sides & back: Minimum 2" clearance from walls for ventilation and heat dissipation
Top: Minimum 4" clearance from ceiling
Front (door swing): The door opens outward — allow full door width (approx 20") plus standing room
⚠️ Do NOT build a fully enclosed, airtight space around the sauna. Airflow around the exterior panels is required for safe operation and to prevent moisture buildup.
Electrical Requirements
The Fuji runs on standard 120V, 15-amp household current.
Plug type: Standard 3-prong NEMA 5-15 (same as any U.S. wall outlet)
Power cord length: Approximately 6 feet from the rear of the unit
Recommended: Dedicate a 15-amp circuit to the sauna (not shared with other high-draw appliances)
No hardwiring required — the Fuji is a plug-in unit
If your outlet is behind the sauna in an enclosure: Plan your outlet placement so the cord can reach without being pinched or stressed. A recessed outlet box on the rear wall of the enclosure works well.
Ventilation Considerations
The Fuji generates heat and some moisture during sessions. For a built-in installation:
Ventilation gap at the top of the enclosure is strongly recommended
A louvered panel or small vent at the top rear allows heat to escape and prevents moisture from trapping in the wood
Do not use a vapor barrier directly against the sauna panels — this traps heat and can damage the wood
Flooring
The Fuji sits on 4 small rubber feet
Compatible with tile, hardwood, laminate, or concrete
Place a waterproof mat or tray underneath if concerned about occasional water/sweat drips
Avoid carpeting directly under the sauna
Access Panels
The control panel is on the interior right wall of the sauna. Exterior controls are on the upper right exterior panel. Leave the right side accessible if building a surround, or ensure the enclosure has a panel cutout.
Assembly Before Enclosure
Important: Assemble the sauna first, verify it powers on and heats correctly, then build the enclosure around it. This makes troubleshooting dramatically easier if there are any issues.
Need the Full Brochure?
Download the Fuji spec sheet here: Fuji Brochure (PDF)
Or contact us at [email protected] for contractor-specific documentation.
El Capitan 4-Person Outdoor Sauna — Full Specs & FAQ
Overview
The Peak Saunas El Capitan is our 4-person outdoor full-spectrum infrared sauna — our flagship outdoor model.
Product page: https://peaksaunas.com/products/peak-saunas-el-capitan-4-person-outdoor-full-spectrum-
Assembly video: https://www.youtube.com/watch?v=GUlX_9wVak0
Specifications
Capacity: 4 persons
Infrared type: Full-spectrum
Indoor/Outdoor: Outdoor
Electrical: (confirm voltage/amperage/circuit requirements)
Dimensions (exterior): 81”W x 55”D x 83”H
Dimensions (interior): 76”W x 50”D x 77”H
Weight: 695 lbs
Assembly time: 2-4 hours with 3 people
Frequently Asked Questions
Q: Is the El Capitan weatherproof?
A: Yes — the El Capitan is designed for outdoor installation.
Q: How difficult is assembly?
A: Watch the full assembly walkthrough: YouTube Assembly Video. Most customers complete assembly in (4 hours) with two people.
Q: What electrical circuit does the El Capitan require?
A:
Electrical: 240V/30A
Outlet Requirement: Dedicated 240V/30A
NEMA L6-30P Locking Plug
Q: Do you offer a down payment option?
A: Yes — contact our sales team for financing and down payment options. We'll send a custom invoice.
Technical Support
For our 1 person saunas, the electrical requirement is 120V / 15amp (standard outlet). For our 2 person saunas, it is 120V / 20amp (dedicated outlet).
The power cord is 9 feet in length and comes from the top of the unit.
- Locate the 4 screws in the slatted floor panel, unscrew with a screw driver.
- Place your fingers between the slats to grip the panel. Lift it slightly off the floor, keeping the side near the bench down. Raise the end near the door and rest it against the bench.
- Unscrew the back of the floor heater connected to the slatted panel. Remove the 6 screws securing the floor heating panel to the slatted floor panel. Once detached, gently place the heating panel on the sauna floor over the silver opening.
- Gently wipe the floor panel with a damp cloth (water only).
Unlike the sauna itself, the red light panel can’t be operated remotely—you’ll need to be within range for it to connect. The good news is the panel doesn’t require any preheating like the infrared heaters do; it’s ready to go as soon as you turn it on. We recommend setting your preferred settings once, then using the remote to power the panel on and off. That way, you won’t need to open the app every time—just press “play,” and your red light panel will start with your saved settings.
Step 1: Inspect the Top Mating Plug
- Locate the top mating plug on the unit.
- Carefully disconnect it and inspect all pins for damage, bending, or corrosion.
- If all pins are intact and clean, firmly reconnect the plug to ensure a solid connection.
Step 2: Open the Power Box
- Remove the cover of the power box.
- Check all internal connections and pins inside the box. Look for:
- Loose wires
- Burn marks or discoloration
- Bent or damaged pins
- If everything looks intact, replace the cover securely before proceeding.
Step 3: Access the Control Panel
- Move on to the control panel assembly.
- Remove the control panel frame by applying even pressure and gently pulling from both sides until it detaches.
- Once the frame is off, locate and remove the screws securing the control panel plate.
- Lift away the plate to expose the internal wiring and connectors.
Step 4: Inspect Wiring and Connectors
- Check all connectors to make sure they are seated firmly.
- Look for any loose, frayed, or damaged wires.
- Inspect for signs of overheating (burn marks, melted insulation).
- If necessary, carefully disconnect and reconnect each plug to ensure proper seating.
The Smart Life app controls our saunas, whereas the Peak Saunas app controls our red light panels. The Smart Life app primarily supports devices that connect over 2.4 GHz Wi-Fi networks. Most smart devices compatible with Smart Life, such as plugs, bulbs, switches, and thermostats, are designed to operate exclusively on the 2.4 GHz band. This frequency offers better range and wall penetration, which is advantageous for smart home setups.
Locate SmartLife app in the App Store:

SmartLife App Pairing Mode Instructions
Why 2.4 GHz Is Required
Many smart devices are built with Wi-Fi modules that only support 2.4 GHz. This design choice helps keep costs down and ensures broader compatibility across various home environments. Therefore, during the initial setup, both your smartphone and the smart device must be connected to the same 2.4 GHz Wi-Fi network.
Dealing with Dual-Band Routers
If your router broadcasts both 2.4 GHz and 5 GHz bands under a single network name (SSID), your phone might default to the 5 GHz band, leading to connection issues during device setup.
- Temporarily disable the 5 GHz band: Access your router's settings and turn off the 5 GHz band during the setup process.
- Separate SSIDs: Configure your router to broadcast separate network names for the 2.4 GHz and 5 GHz bands, allowing you to manually select the 2.4 GHz network on your phone.
- Use AP Mode: Some devices support Access Point (AP) mode, which can facilitate pairing on dual-band networks.
Additional Tips
- Move closer to the router: Being closer can help your phone connect to the 2.4 GHz band, as it has a longer range but slower speed compared to 5 GHz.
- Use a device that only supports 2.4 GHz: Some older smartphones or tablets only connect to 2.4 GHz networks, which can simplify the setup process.
- Create a guest network: Set up a guest Wi-Fi network on the 2.4 GHz band specifically for your smart devices.
Once your devices are successfully connected to the 2.4 GHz network, you can typically re-enable the 5 GHz band or return to your unified SSID setup without affecting device functionality.
Video Instructions
Before you start
- Power: Make sure both the sauna and the red-light panel rocker/switch are ON.
- If the red-light panel isn’t switched on, it won’t connect or show up in the app.
- Phone settings: Turn Bluetooth on. Allow the app any permissions it requests (Bluetooth/Location for device discovery).
- Distance: Be near the sauna (a few feet) when adding devices, especially for the red-light panel.
- Wi-Fi note: Unlike Smart Life, you don’t need to be on a 2.4 GHz network to connect.
Add / Reconnect the Red-Light Panel
- Confirm the red-light panel’s physical switch is ON.
- In the app, tap Search Device.
- When the red-light panel appears, select it and complete pairing.
- Rename it if you like for easy identification.
Important limitations vs. Smart Life:
- You cannot start the red-light panel remotely from outside range.
- You must be within Bluetooth range for the app to detect and control the panel
If the device doesn’t appear
Try these in order (quick checks first):
- Move closer to the control box/panel (Bluetooth range).
- Toggle power: Switch the red-light panel OFF, wait 5 seconds, then ON.
- Force-quit & reopen the Peak app.
- Bluetooth reset: Toggle your phone’s Bluetooth OFF → ON.
- Power cycle sauna: Turn sauna main power OFF for 15 seconds, then ON.
- Only one phone: Make sure the panel isn’t already connected to another phone nearby.
- Remove & re-add: In the app, delete the device (if partially added), then Search Device again.
Common questions & answers
- “I’m on 5 GHz / cellular—will it pair?” Yes. Peak doesn’t require 2.4 GHz to connect.
- “Why can I turn the sauna on remotely but not the panel?” The sauna supports remote on; the red-light panel requires local (in-range) control.
- “Panel still won’t show up?” Double-check its physical switch is ON and that you’re right next to the unit. Repeat the “If the device doesn’t appear” list.
Follow the steps below to safely replace a full spectrum heater in your Peak Sauna. Please review the entire guide before starting, and refer to the photos provided with your kit for visual reference.
Step 1 – Unpack the Replacement Heater
- Using a screwdriver or drill, remove the screws from the box panel marked “Fragile.”
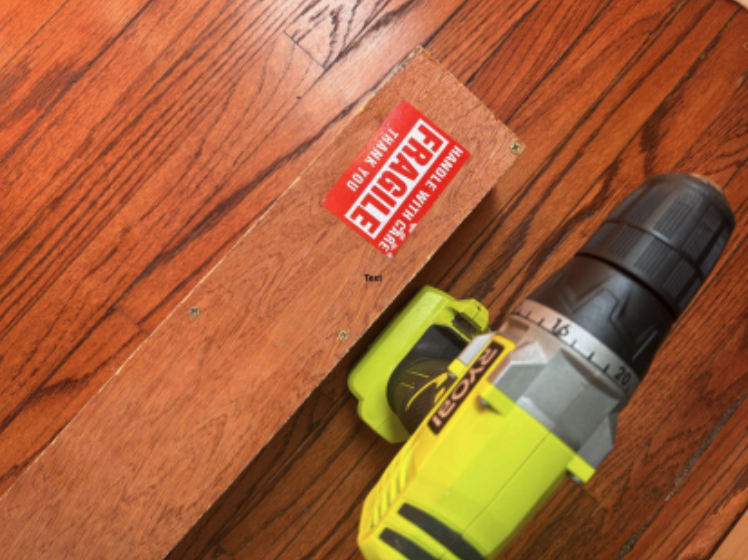
- Carefully lift off the styrofoam protection. Inspect the new heater for any visible damage
- If undamaged, set the heater aside in a safe place until needed.
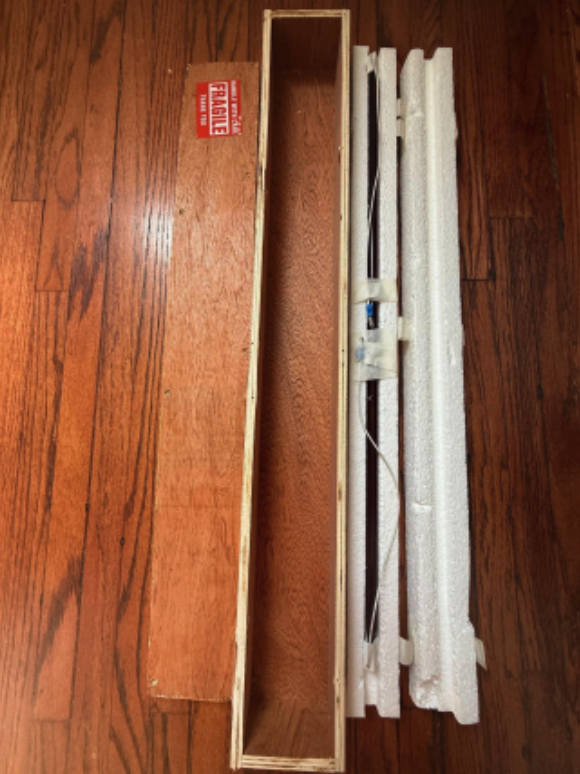
- If undamaged, set the heater aside in a safe place until needed.
Step 2 – Remove the Heater Guard
- Locate the back wall heater guard panel inside the sauna. Remove the four screw covers.
- Using a screwdriver or drill, remove the screws holding the guard to the back wall.
⚠️ Important: Do not pull the wooden guard fully away yet—there are connectors at the base. Instead, gently lay the guard flat on the bench.
Step 3 – Disconnect Lighting & Remove Guard Panel
- Disconnect the lighting connector.
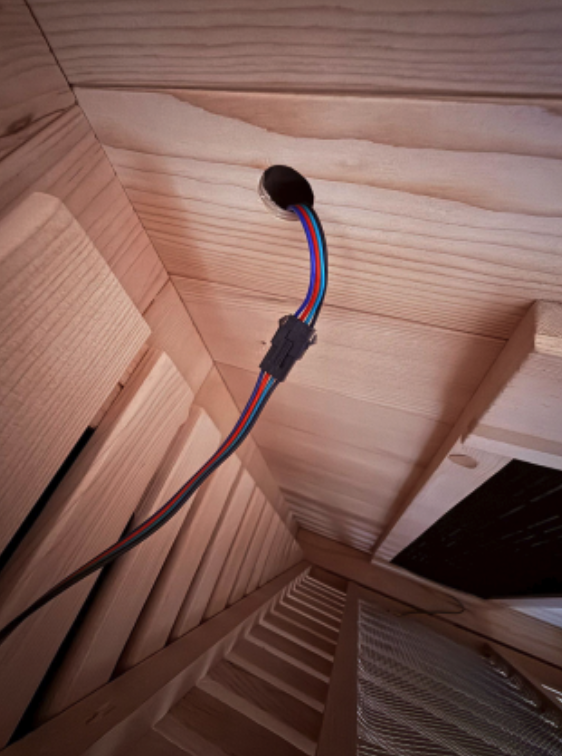
- Remove the two connector screws at the base securing the wooden guard panel.
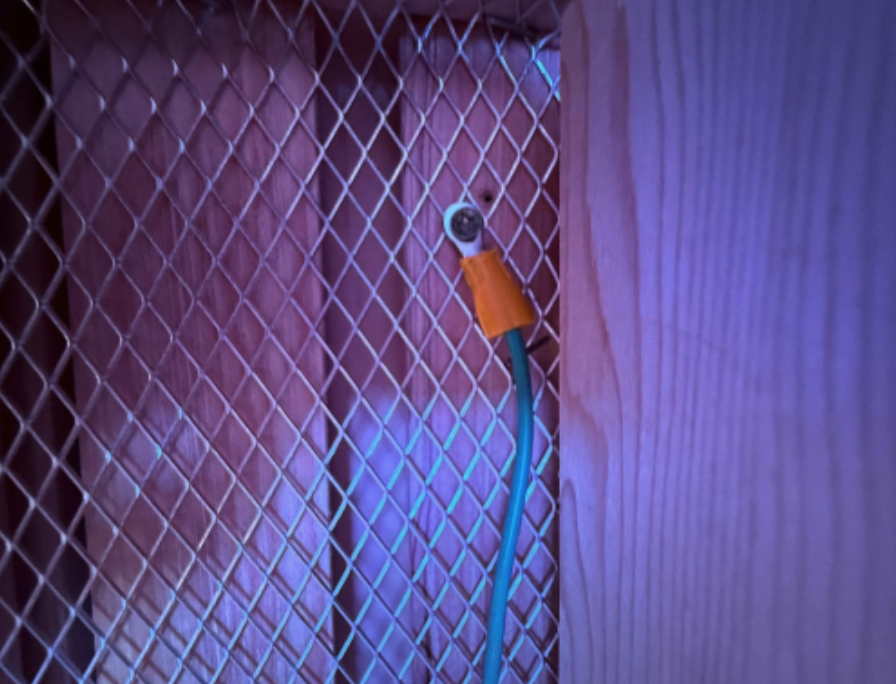
- Set the wooden guard panel outside of the sauna to create workspace.
Step 4 – Remove the Heater Frame
- Unscrew the four screws holding the heater’s wooden frame.
- Do not pull the frame straight off—the heater is still wired at the base.
- Gently lay the frame flat on the bench.
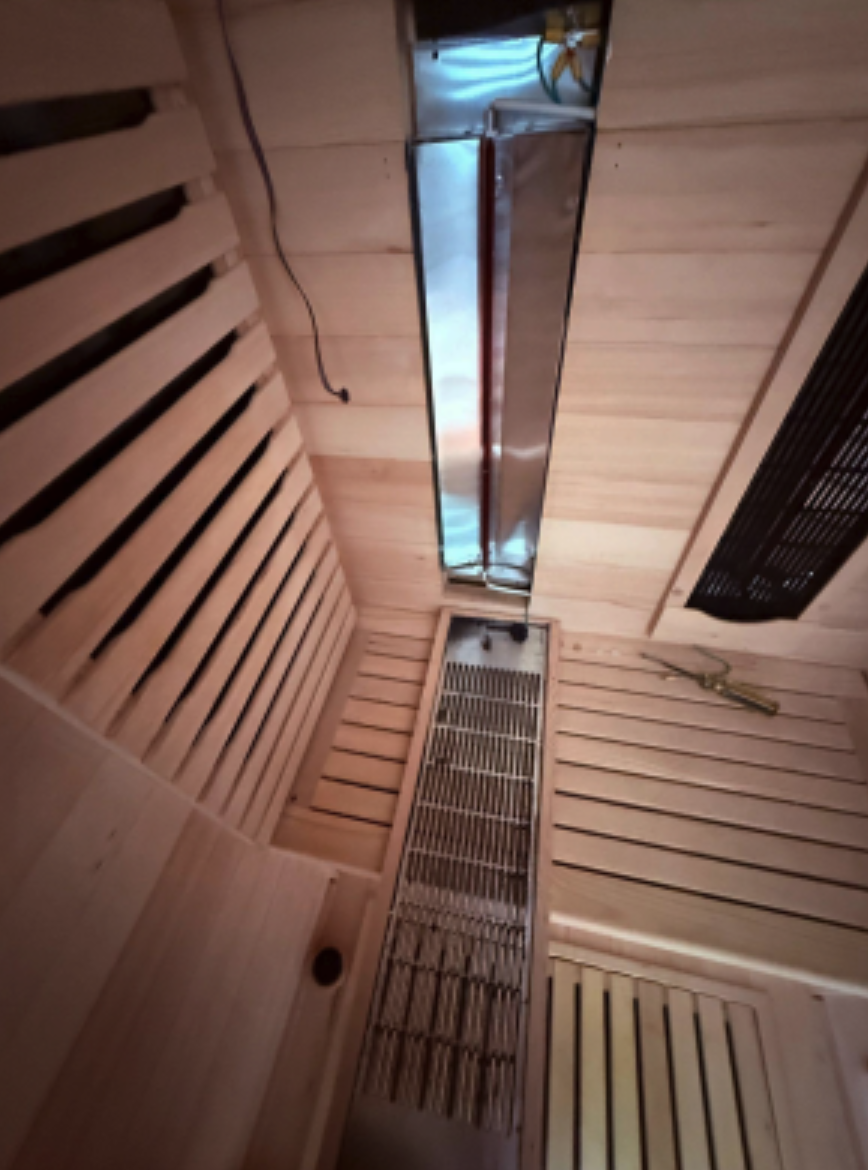
Step 5 – Remove the Old Heater
- Hold the white plastic protectors at the top and bottom of the heater. Carefully release the heater from the metal clips.
⚠️ Important: Do not pull from the heater body itself—it is fragile.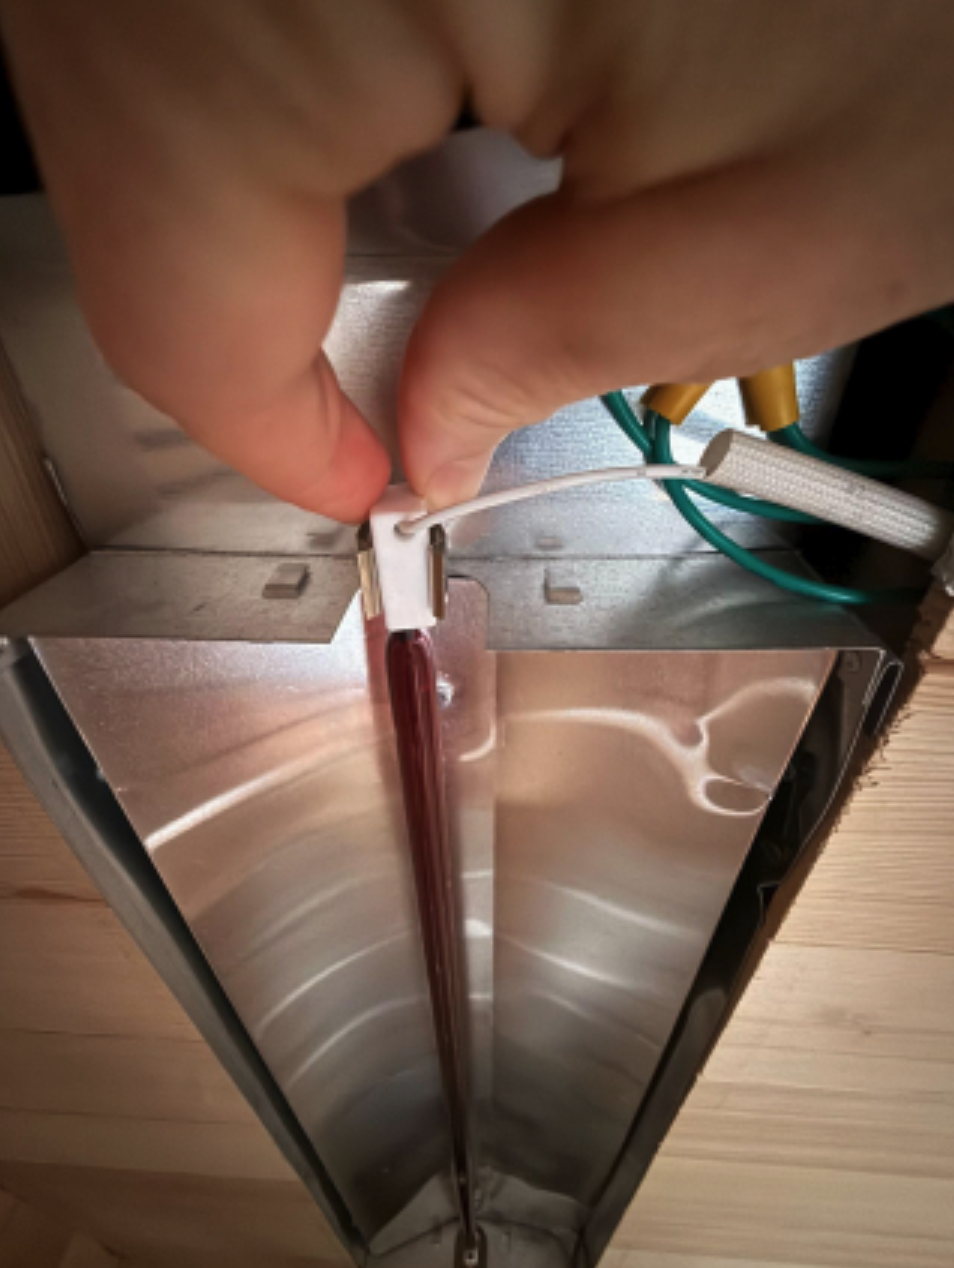
- Gently pull the wire forward until you see the connector wrapped in black tape.
- Remove the tape. Disconnect the heater at both the top and bottom connectors.
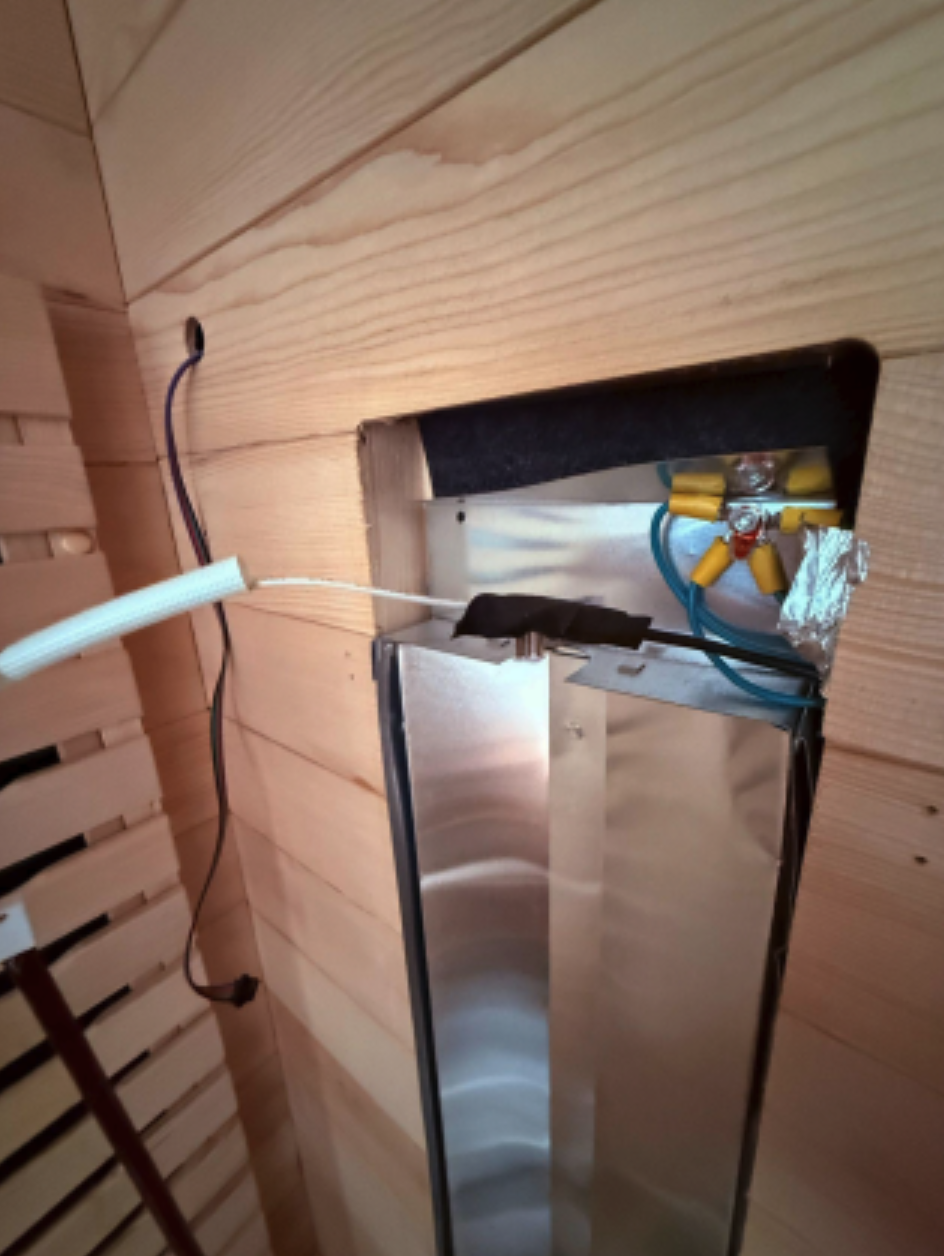
Step 6 – Install the New Heater
- Connect the replacement heater to the top and bottom connectors.
- Wrap the connectors with the black tape you removed earlier.
- Secure the new heater back into the metal clips at the top and base.
Step 7 – Reassemble the Sauna
- Re-attach the heater’s wood frame using the four screws.
- Re-install the wood guard panel, reconnect the lighting connector, and screw in the two
- connectors at the base.
- Replace the heater guard on the back wall, covering screws with the caps.
Step 8 – Test the Sauna
- Power on your sauna and confirm the new heater is functioning properly.
✅ You’re all set! Your replacement heater is now installed.
1. Automatic Shut-Off at Max Temperature is Normal
If the red light panel shuts off when the sauna reaches its maximum temperature, this is completely normal and expected behavior. All infrared saunas, including ours, have built-in safety features that automatically power down the sauna — and any connected devices — to prevent overheating. This is an important point to emphasize so the custom knows that this is industry standard, no matter the brand.
- This is not a quality issue, defect, or malfunction.
- The shut-off typically lasts 30–60 seconds before the system resets and powers back on.
- To make restarting the red light therapy panel easier, we recommend keeping the remote control inside the sauna with you during your session. This way, you can simply press "play" to resume the red light therapy without needing to open the app or get up.
2. My Red Light Panel won't turn on
Make sure to be pressing the start button. Here's a video that walks you through how to start the red light panel:
3. Two Options to Prevent Interruptions
If the shut-off becomes inconvenient, here are two simple options to maintain an uninterrupted red light session:
- Option 1:
Start the red light therapy before the sauna reaches its maximum temperature.
For example, if you set your sauna to 150°F, begin using the red light panel when the sauna reaches around 120°F. This allows you to complete a full therapy session before the sauna’s safety cycle kicks in. - Option 2:
Use the longer power cord to plug the red light panel into a separate wall outlet.
To use the longer power cord provided with your red light therapy panel, first disconnect Power Cord C on the roof panel from the power box connector. Next, connect Power Cord C to the longer power cord, and then plug the longer power cord into a standard 120V / 15AMP outlet.
Note: Lead with Option 1. One of the key benefits of this sauna is that the red light therapy panel is designed to integrate seamlessly with the sauna itself. Using a separate outlet is simply a workaround for users who prefer uninterrupted sessions, but it’s not the primary intended setup.
The timer in your Peak Sauna will automatically default to being on for 90 minutes if you leave it unchanged. After each session, the system resets back to 90 minutes as well, so there’s no need to manually reset it unless you’d like a shorter session.
Please take a photo of it and reach out to [email protected] with your order number so we can get you a replacement as soon as possible.
It depends on which red light mode you’re using.
If you’re using Red Light Only
In red light mode, the panels are designed for light output—not heat—so they should not feel hot.
If you’re using Near Infrared (NIR)
In near infrared mode, it’s normal for the panel to feel slightly warm. That said, it will not get anywhere near as hot as the main infrared heating panels.
Quick summary
- Red Light Only = not hot
- Near Infrared = slightly warm (normal)
- Infrared heater panels = much hotter
If you’re unsure which mode your sauna is currently in, our team can help you confirm your settings.
It can take up to 60 minutes to reach max temperature in some cases. But it truly should be getting to 140 at least in under 40 minutes.
Please double check the following things:
- Can you confirm it is on the correct __v/_ amp Non-GFCI outlet and that is what is flowing from that outlet?
- Is the vent open at the top of the sauna while using / preheating?
- Are all the heating elements warm to the touch after a few minutes of starting the sauna?
- Is the ambient temperature of the room the sauna is in at least 65 degrees?
If yes, please run a temperature test.
Temperature test steps:
- Start by getting the ambient temperature of the room the sauna is in before starting the sauna.
- Record the temperature reading inside the sauna at 15 minutes
- Record the temperature reading inside the sauna at 30 minutes
- Record the temperature reading inside the sauna at 45 minutes
- Record the temperature reading inside the sauna at 60 minutes
Please send the results of this temperature test to [email protected] and we can further assist.
Im so sorry to hear about this!
The first thing I would try is a reset of the unit. On the roof panel you should find a power supply reset button.
Please make sure the sauna is off and unplugged before this.
If that does not work please reach out to support and we would be happy to contact the manufacturer to get this solved as quickly as possible.
Red Light Therapy Panel Settings & Benefits
How Each Setting Supports Your Health, Recovery, and Wellness Goals
Our Red Light Therapy Panel is designed to deliver targeted, customizable light therapy using clinically relevant red and near-infrared wavelengths. Each setting plays a role in how the light interacts with your body. Understanding these settings helps you get the most out of every session.
1. Red Light Mode (630–670 nm)
Surface-Level & Skin-Focused Benefits
Red light operates within the visible spectrum and primarily affects the skin and shallow tissues.
Benefits include:
Supports skin health, tone, and appearance
Helps improve circulation near the skin’s surface
Assists with inflammation and joint comfort
Promotes cellular energy production (ATP) in skin cells
This mode is commonly used for facial treatments, joints, and localized areas where surface-level support is desired.
2. Near-Infrared (NIR) Mode (810–1060 nm)
Deep Tissue, Muscle & Joint Support
Near-infrared light is invisible to the eye but penetrates deeper into the body than red light.
Benefits include:
Reaches muscles, joints, and connective tissue
Supports circulation and oxygen delivery at depth
Aids in muscle recovery and physical performance
Helps reduce discomfort associated with stiffness or overuse
This mode is ideal for recovery, athletic use, and full-body wellness routines.
3. Combined Mode (Red + Near-Infrared)
Comprehensive Full-Body Benefits
Combined mode delivers red and near-infrared wavelengths simultaneously.
Benefits include:
Supports both skin-level and deep-tissue wellness
Promotes overall cellular health and energy efficiency
Ideal for full-body sessions and general longevity routines
This is the most commonly used setting for users seeking balanced, all-around benefits.
4. Individual Wavelength Control
Precision Customization
The panel includes 8 individual wavelengths, each adjustable from 0–100% brightness.
Benefits include:
Ability to tailor sessions to specific goals
Reduced intensity for sensitive areas
Increased control for experienced users
Flexibility to emphasize red or near-infrared light as needed
This feature allows users to fine-tune their therapy without changing modes.
5. Brightness Control (0–100%)
Intensity Management
Brightness determines how much light energy is delivered during a session.
Benefits include:
Lower brightness for beginners or facial use
Higher brightness for larger muscle groups or recovery
Comfortable progression as the body adapts
Brightness can be adjusted manually, incrementally, or by direct input for precise control.
6. Pulse Mode (1–10,000 Hz)
Controlled Light Delivery for Comfort & Customization
Pulse Mode delivers light in rapid on/off cycles rather than continuous output.
Benefits include:
Reduced perceived intensity while maintaining light exposure
Less heat sensation during longer sessions
Improved comfort for sensitive users
Increased flexibility for advanced users experimenting with frequency
At certain frequencies, pulsed light may not appear visibly “on.” This is normal and does not affect performance.
Pulse Mode is optional and intended as a customization tool, not a requirement for effectiveness.
7. Timer Control (1–30 Minutes)
Consistent & Safe Sessions
The timer automatically shuts the panel off when the session ends.
Benefits include:
Prevents overuse
Encourages consistent routines
Allows hands-free operation
The device will also shut off automatically if no timer is set, providing an additional safety layer.
8. Group Control (Multiple Panels)
Expanded Coverage
Group mode allows multiple panels to operate together under one primary control.
Benefits include:
Synchronized settings across panels
Ideal for full-body or commercial setups
Simplified operation for larger systems
Summary
Each setting on your Red Light Therapy Panel is designed to support cellular health, circulation, recovery, and overall well-being. Whether you prefer a simple continuous session or advanced customization using Pulse Mode and individual wavelength control, the panel adapts to your needs—not the other way around.
If you’d like help choosing settings for a specific goal, our support team is always happy to assist.
Chromotherapy Lighting in Saunas
How Color Light Enhances Relaxation, Mood, and the Sauna Experience
Chromotherapy, also known as color light therapy, uses different colors of visible light to help influence mood, relaxation, and mental state. In a sauna environment, chromotherapy lighting is designed to enhance the overall experience by creating a calming, intentional atmosphere that complements heat therapy.
Chromotherapy works through visual and neurological pathways. The eyes perceive color and transmit signals to the brain, which can influence emotional response, stress perception, and relaxation. While chromotherapy is not a medical treatment, many users find it to be a valuable wellness and mindfulness tool when used consistently.
Red Light
Energizing and Grounding
Red light is associated with warmth, vitality, and stimulation.
Common benefits include creating a sense of energy and motivation, supporting alertness during sauna sessions, enhancing feelings of warmth and circulation awareness, and helping users feel grounded and present. Red chromotherapy is often used during morning sessions or after workouts when a more invigorating environment is desired.
Blue Light
Calming and Stress Reducing
Blue light is known for its cooling and soothing qualities.
Benefits include encouraging deep relaxation, reducing mental overstimulation, supporting slower breathing patterns, and creating a tranquil atmosphere. Blue chromotherapy is commonly used during evening sessions or after high stress days to promote calm and relaxation.
Green Light
Balancing and Restorative
Green is associated with balance, harmony, and emotional stability.
Benefits include promoting a sense of equilibrium, reducing feelings of tension, supporting relaxation without sedation, and creating a neutral, grounding environment. Green light is ideal for longer sauna sessions or for users who want a steady, calming experience without strong stimulation.
Yellow Light
Uplifting and Clarifying
Yellow light is linked to positivity, warmth, and mental clarity.
Benefits include supporting an uplifted mood, encouraging focus and mental alertness, creating a welcoming and optimistic atmosphere, and helping counter feelings of fatigue. Yellow chromotherapy is often used earlier in the day or when users want a brighter, more energizing sauna experience without overstimulation.
Purple or Violet Light
Meditative and Calming
Purple light blends the energizing qualities of red with the calming effects of blue.
Benefits include promoting deep relaxation, supporting mindfulness and meditation, encouraging introspection, and creating a spa like environment. Purple chromotherapy is commonly chosen for meditation focused sessions or when users want a quiet, introspective sauna experience.
White Light
Neutral and Natural
White light combines all visible colors and provides a clean, balanced illumination.
Benefits include offering a natural lighting environment, supporting clarity and focus, allowing users to experience the sauna without color influence, and serving as a baseline lighting option. White light is ideal for users who prefer simplicity or consistent illumination.
How to Use Chromotherapy in Your Sauna
Chromotherapy lighting can be used for the entire sauna session or adjusted throughout based on your intention and how your body feels. For relaxation focused sessions, start with calming colors such as blue, green, or purple. These colors pair well with slower breathing, meditation, or quiet rest.
For energizing or recovery focused sessions, choose red or yellow lighting, especially during morning use or post workout sauna sessions. For longer sessions, consider using color cycling mode or switching colors midway through your session to refresh the sensory experience.
Chromotherapy can be combined with other wellness practices such as controlled breathing, stretching, or meditation. Many users find it helpful to select one color per session to create consistency, while others prefer rotating colors based on mood.
If your sauna system allows, adjust lighting intensity to match the session. Lower brightness levels are often preferred for evening or meditation sessions, while brighter lighting can feel more energizing earlier in the day.
Best Practices and Tips
Chromotherapy is most effective when used consistently and intentionally. Choose colors based on how you want to feel rather than following a strict formula. Individual responses to color can vary, so experimentation is encouraged.
Chromotherapy lighting is designed to enhance the sauna experience, not replace the benefits of heat therapy. It is a supportive tool that helps create a calming environment, improve enjoyment, and encourage regular sauna use.
Summary
Chromotherapy lighting adds an additional layer of personalization and relaxation to sauna sessions. Each color offers a unique sensory experience that can help support mood, mental clarity, and relaxation. When used intentionally, chromotherapy can turn a sauna session into a more immersive and restorative wellness ritual.
The red light panel, while listed as a separate item, is included in the main crate with the sauna an the sauna will not be completely sealed without it
The sweet spot for the distance from you to our panels is 12-24 inches from the panel. Any further away and your benefits will be slightly diminished, but you can even be as close as 6 inches from the panel and safely gain all the benefits.
If you choose to remove the red light therapy panel and use it externally, you’ll still need to keep the 4 mounting holes sealed in the glass.
✅ The correct way to plug the holes is to use the hardware that came with your sauna, which includes:
The bolts/screws provided
The rubber gaskets/covers (one on each side of the glass)
Step-by-step (recommended setup)
Remove the red light panel from the glass.
For each hole, place a rubber gasket on the inside of the glass.
Place the matching rubber gasket on the outside of the glass.
Insert the bolt through the hole and tighten it until snug.
This creates a sealed, secure fit and helps prevent movement, airflow gaps, or stress on the glass.
⚠️ Important note
Those holes are designed specifically for the red light panel to be mounted in the sauna, so using the included bolts + rubber gaskets is the best and safest solution. If you want a more “permanent/clean” cosmetic option, you can explore aftermarket hole plugs, but we don’t currently have a separate long-term plug kit we recommend.
With the ozone device, it is designed to run consistently, so I would go ahead and install that in your sauna. It helps with keeping your sauna clean by breaking down bacteria post session as well as purifying the air!
- Air and surface disinfection — Ozone (O₃) is a powerful natural oxidant that breaks down bacteria, viruses, mold, odors, and organic contaminants (like sweat residues) in the enclosed sauna space, keeping the environment fresher and more hygienic between uses.
- Reducing microbial buildup — In humid, warm sauna conditions, ozone helps prevent the growth of harmful microbes on benches, walls, and air, making maintenance easier without heavy chemical cleaners.
- Odor elimination — It neutralizes lingering smells from heavy sweating sessions.
Problems with power to
Lugano 3 Person Low EMF Indoor FAR Infrared Sauna
- Loose or faulty internal wiring/connections (e.g., the "CTRL" harness from the roof/control box).
- A blown internal fuse
- Faulty relay, switching transformer, or power supply board.
- Control board glitch or needs reset beyond simple unplugging.
- Unplug the unit for at least 30–60 minutes (longer than overnight if possible) to fully discharge capacitors.
- Plug back in and immediately try pressing/holding the POWER or START button for 5–10 seconds.
- Some panels respond better after a full discharge.
- Many Dynamic/Lugano models have the main power supply/control box on the roof (remove the roof panel or access hatch if your manual shows how) or under the bench.
- Look for a small fuse (glass or ceramic) on the power board—test/replace if blown (common 3–5A fast-blow type; cheap at hardware stores).
- Inspect and firmly reseat any harness plugs labeled "CTRL" or similar (these connect the panel to the main board and often loosen during shipping/use).
- Confirm the outlet is providing full 120V (use a voltage tester).
- Check if there's any burning smell, loose wires, or visible damage (e.g., on cords).
- Note: The display showing "88.8" or "8.8.8." is often a segment test on startup, but if it stays stuck, it's a sign the board isn't progressing.
How to Check the Wiring for a Non-Working Control Panel
Step 1: Inspect the Top Mating Plug
Locate the top mating plug on the unit.
Carefully disconnect it and inspect all pins for damage, bending, or corrosion.
If all pins are intact and clean, firmly reconnect the plug to ensure a solid connection.
Step 2: Open the Power Box
Remove the cover of the power box.
Check all internal connections and pins inside the box. Look for:
Loose wires
Burn marks or discoloration
Bent or damaged pins
If everything looks intact, replace the cover securely before proceeding.
Step 3: Access the Control Panel
Move on to the control panel assembly.
Remove the control panel frame by applying even pressure and gently pulling from both sides until it detaches.
Once the frame is off, locate and remove the screws securing the control panel plate.
Lift away the plate to expose the internal wiring and connectors.
Step 4: Inspect Wiring and Connectors
Check all connectors to make sure they are seated firmly.
Look for any loose, frayed, or damaged wires.
Inspect for signs of overheating (burn marks, melted insulation).
If necessary, carefully disconnect and reconnect each plug to ensure proper seating.
also recommend these links to videos:
https://drive.google.com/file/d/1wvHZGn34eN6jdjIyDdot9fTA8z46Eecd/view?pli=1
https://drive.google.com/file/d/1rDqpo7sP4sR2gQJ3YXWzyT-HZODQ2EJd/view?pli=1
Here is an assembly video for the Peak Kilimanjaro Sauna: https://www.youtube.com/watch?v=adb08o_ZNUY
Different Peak Saunas models have different electrical requirements. Find your model below to see the exact specifications needed for installation.
Standard 120V Models (Plug into existing outlet)
| Model | Capacity | Voltage | Wattage | Amperage | Outlet Required |
|---|---|---|---|---|---|
| Aspen | 1-Person Indoor | 120V | 1800W | 15A | Standard 15A outlet |
| Olympus | 1-Person Indoor | 120V | 1800W | 15A | Standard 15A outlet |
| Crown | 2-Person Indoor | 120V | 1800W | 15A | Standard 15A outlet |
120V Models (Dedicated 20A circuit required)
| Model | Capacity | Voltage | Wattage | Amperage | Plug Type |
|---|---|---|---|---|---|
| Everest | 2-Person Indoor | 120V | 2050W | 20A | NEMA 5-20P |
| Fuji | 2-Person Indoor | 120V | 2050W | 20A | NEMA 5-20P |
240V Models (Electrician installation required)
| Model | Capacity | Voltage | Amperage | Plug Type |
|---|---|---|---|---|
| Denali | 3-Person Indoor | 240V | 20A | NEMA 6-20P |
| Matterhorn | 3-Person Indoor | 240V | 20A | NEMA 6-20P |
| Patagonia | 2-Person Outdoor | 240V | 20A | NEMA L6-20P (Locking) |
| El Capitan | 4-Person Outdoor | 240V | 30A | NEMA L6-30P (Locking) |
| Kilimanjaro | 5-Person Outdoor | 240V | 30A | NEMA L6-30P (Locking) |
Installation Notes
- 120V/15A models can plug into a standard household outlet
- 120V/20A models require a dedicated 20-amp circuit with NEMA 5-20P outlet
- 240V models require professional electrician installation
- Power cord is approximately 9 feet on all models
Tip: Show your electrician these specs when scheduling the work.
The red light panel comes with a standard 9-foot power cord.
Need a Longer Cord?
If you need to reposition your panel further from the outlet, use a C14 to C13 Power Extension Cord with these specifications:
- Rating: 10A 125V
- Gauge: 18AWG
- Standard: IEC-320
- Connectors: C14 Male to C13 Female
These are readily available on Amazon. Search for "C14 to C13 extension cord."
Important: Do not use a standard household extension cord – it won't fit the connector.
After Each Session
Leave the door open to air out and allow moisture to evaporate.
Weekly Cleaning
Wipe all surfaces with a soft cloth dampened with warm water and mild soap (diluted dish soap works great). Rinse with a damp cloth and dry.
Monthly Deep Clean
Give extra attention to benches and backrests where sweat accumulates.
What NOT to Use
- Bleach or ammonia
- Harsh chemical cleaners
- Abrasive scrubbers or pads
Pro Tip: Place a towel on the bench during sessions to absorb sweat and make cleanup easier.
Different heater panels in your sauna may feel different temperatures – this is completely normal.
Why Panels Feel Different
Wall panels typically feel hotter to the touch than bench panels. This is by design.
Bench panels are engineered for radiant heat from a seated position. They warm your body directly through infrared without needing to feel hot to touch.
When to Contact Support
If a panel produces no heat at all, check the wiring connections first. If the issue persists, contact our support team for troubleshooting.
 ARTICLE 1: Electrical Requirements & Outlet Specifications
Category: Technical Support
This is the big one — customers asking "what outlet do I need?" We need a per-model breakdown:
• 120V/15A (standard outlet): Aspen, Olympus, Crown, Shasta, Rainer
• 120V/20A (dedicated circuit, NEMA 5-20P): Everest, Fuji
• 240V/20A (NEMA 6-20P): Denali, Matterhorn
• 240V/20A (NEMA L6-20P locking): Patagonia
• 240V/30A (NEMA L6-30P locking): El Capitan, Kilimanjaro
Different Peak Saunas models have different electrical requirements. Find your model below to see the exact specifications needed for installation.
Standard 120V Models (Plug into existing outlet)
Model | Capacity | Voltage | Wattage | Amperage | Outlet Required |
|---|---|---|---|---|---|
Aspen | 1-Person Indoor | 120V | 1800W | 15A | Standard 15A outlet |
Olympus | 1-Person Indoor | 120V | 1800W | 15A | Standard 15A outlet |
Crown | 2-Person Indoor | 120V | 1800W | 15A | Standard 15A outlet |
120V Models (Dedicated 20A circuit required)
Model | Capacity | Voltage | Wattage | Amperage | Plug Type |
|---|---|---|---|---|---|
Everest | 2-Person Indoor | 120V | 2050W | 20A | NEMA 5-20P |
Fuji | 2-Person Indoor | 120V | 2050W | 20A | NEMA 5-20P |
240V Models (Electrician installation required)
Model | Capacity | Voltage | Amperage | Plug Type |
|---|---|---|---|---|
Denali | 3-Person Indoor | 240V | 20A | NEMA 6-20P |
Matterhorn | 3-Person Indoor | 240V | 20A | NEMA 6-20P |
Patagonia | 2-Person Outdoor | 240V | 20A | NEMA L6-20P (Locking) |
El Capitan | 4-Person Outdoor | 240V | 30A | NEMA L6-30P (Locking) |
Kilimanjaro | 5-Person Outdoor | 240V | 30A | NEMA L6-30P (Locking) |
Installation Notes
120V/15A models can plug into a standard household outlet
120V/20A models require a dedicated 20-amp circuit with NEMA 5-20P outlet
240V models require professional electrician installation
Power cord is approximately 9 feet on all models
Tip: Show your electrician these specs when scheduling the work.
ARTICLE 2: Red Light Panel Cord & Extension Options
Category: Technical Support
For customers asking about cord lengths for sauna:
• Standard cord: 9 feet
For all indoor models it comes out of the roof panel near the front center of the panel
For all outdoor models it comes out of the top center of the back panel
For the red light panel:
There comes an extra cable if you want to use the red light panel independently or to troubleshoot the issue with a faulty panel
If you want a longer cord for connection from sauna to red light panel:
• Extension spec: C14 to C13, 10A 125V, 18AWG IEC-320
Different heater panels in your sauna may feel different temperatures – this is completely normal.
Why Panels Feel Different
Wall panels typically feel hotter to the touch than bench panels. This is by design.
Bench panels are engineered for radiant heat from a seated position. They warm your body directly through infrared without needing to feel hot to touch.
When to Contact Support
If a panel produces no heat at all:
Check the wiring connections
Ensure all connections are secure
If the issue persists, contact our support team
MY SAUNA GLASS DOOR SHATTERED — WHAT DO I DO?
First: don't panic. Tempered glass is designed to shatter into small, rounded pieces rather than sharp shards. This is a safety feature.
Immediate steps:
1. Do not use the sauna until the door is replaced
2. Carefully clean up the glass fragments (wear gloves)
3. Contact us at [email protected] with:
- Your order number
- A photo of the damage
- Description of what happened (did the door slam? Did it crack spontaneously?)
If your sauna is under warranty: We'll ship a replacement door at no charge. Standard warranty covers glass defects and spontaneous failures.
WHY DID MY GLASS DOOR SHATTER?
Common causes:
- Thermal stress — Rapid temperature changes (e.g., cold water on hot glass)
- Impact damage — Door slammed forcefully or object contacted the glass
- Manufacturing defect — Rare, but covered under warranty
- Repeated stress cycles — Heavy daily use over time
To prevent future failures:
- Close the door gently — avoid slamming
- Never splash cold water directly on the glass during or after use
- Inspect door hinges/alignment regularly; misalignment increases stress
- Don't lean against or apply pressure to the glass
RECURRING DOOR FAILURES
If your door has failed more than once, there may be an underlying issue:
- Hinge misalignment — Contact support for a hinge adjustment guide
- Improper installation — The door frame may need re-seating
- Structural issue — In rare cases, we'll replace the full door frame assembly
Contact us immediately if you've had 2+ glass failures. We take this seriously and will escalate
to our quality team.
REPLACEMENT DOOR TIMELINE
- Warranty replacements typically ship within 3–5 business days
- Freight delivery for door panels: 5–10 business days
- Installation is DIY-friendly; we'll send written instructions with the part
Email [email protected] with your order number and photos. Our team responds within 1-2 business days.
Applies to: Peak Saunas models with detachable or portable side heater/bench heater units
MY HEATER UNIT ISN'T WORKING AFTER REPLACING THE BULB
If you've replaced the bulb but the unit still doesn't heat up or light up, the issue may not be the bulb at all.
Please ensure the that unit has been unplugged and turned off for more than 10 minutes before inspecting any heaters.
Step-by-step diagnosis:
1. Check the power connection
- Ensure the heater unit is fully seated/connected to the sauna's wiring harness
- Unplug and re-plug the connector firmly — it should click or lock into place
- Inspect the connector pins for corrosion or bent contacts
2. Inspect the wiring inside the unit
- Remove the cover panel (2–4 screws, model-dependent)
- Look for: loose wire connections at the terminal block, burnt or discolored wires, any wire that has pulled free from its connector
- Do not attempt to splice or repair wires yourself — contact support for a replacement unit
3. Test the bulb in isolation
- Try the bulb in a known-working socket to confirm it's not defective out of the box
4. Check the fuse
- Some portable heater units have an inline fuse
- Location: usually on the power input wire near the base of the unit
- Replace with the same amperage fuse (check your manual)
WHEN TO REQUEST A REPLACEMENT UNIT
Contact support if:
- Wiring inside the unit appears burnt, melted, or disconnected
- The unit failed within the first 12 months (covered under warranty)
- Replacing the bulb and checking connections didn't resolve the issue
What to send us:
- Order number
- Photos of the unit and wiring
- Description of what you've already tried
REPLACEMENT UNIT TIMELINE
- In stock warranty replacements ship in 3–5 business days
- If not available in our warehouse, may be 60-90 days out
- We'll include installation instructions
PREVENTIVE TIPS
- Never force the heater unit into place — misalignment can stress the wiring connections
- Inspect connections annually as part of regular maintenance
- Keep the heater unit dry — moisture can cause corrosion on connectors
Email [email protected] with your order number and a photo of the issue.
Why Does My Sauna Keep Tripping the Circuit Breaker?
A tripping circuit breaker is the most common issue new sauna owners encounter — and in the vast majority of cases, the fix is simple. Here's how to diagnose and solve it:
The Most Common Cause: Wrong Outlet
If your sauna keeps tripping the breaker, the first thing to check is whether you're using the correct electrical outlet for your model.
Models that need a standard 120V / 15A outlet: Olympus, Aspen, Shasta, Rainier, Crown
Models that need a dedicated 120V / 20A outlet: Everest, Fuji
Models that need a dedicated 240V / 20A circuit: Denali, Matterhorn, Patagonia
Models that need a dedicated 240V / 30A circuit: Kilimanjaro, El Capitan
If your Everest or Fuji is plugged into a standard 15A outlet, it will trip the breaker. This isn't a fault with the sauna — it's drawing more power than a 15A circuit is designed to handle. The solution is having an electrician install a dedicated 20A outlet (typically $150–$250).
Other Causes and Solutions
Shared Circuit
Even for 15A models, if the sauna shares a circuit with other appliances (space heater, vacuum, hair dryer), the combined draw can trip the breaker. Use a dedicated circuit — meaning nothing else is plugged into outlets on the same breaker.
Faulty GFCI Outlet
If your sauna is plugged into a GFCI outlet (the kind with the Test/Reset buttons, often found in bathrooms), these outlets are more sensitive to power fluctuations and may trip more easily. A standard outlet on a dedicated circuit is preferred. Do not install a GFCI outlet or breaker for Peak Sauna models.
Extension Cords
Never use an extension cord with your sauna. Extension cords create voltage drops and can overheat, causing breaker trips and potential fire hazards. Always plug directly into a wall outlet.
Loose Wiring
If none of the above apply and the breaker continues to trip, there may be a loose connection in the sauna's internal wiring. Contact our support team — this is covered under warranty.
How to Check Your Outlet
Not sure what kind of outlet you have? Here's a quick guide:
Standard 15A outlet: Two vertical slots and a round ground hole. This is the most common residential outlet.
20A outlet: Looks similar to 15A but has a T-shaped slot on the left side. If yours doesn't have the T-shape, it's likely 15A.
240V outlet: Much larger than a standard outlet — often has 3 or 4 prong configurations. Similar to a dryer or oven outlet.
When in doubt, your electrician can confirm the amperage and voltage of any circuit in seconds.
Quick Troubleshooting Steps
Verify your outlet matches your model's requirements (see above)
Unplug everything else on the same circuit
Remove any extension cords — plug directly into the wall
Reset the breaker and try again
If it still trips, contact us with your model name and a photo of your outlet
Still Have Questions?
Electrical issues are frustrating, but they're almost always fixable. Our support team has helped hundreds of customers through this. Reach out at [email protected] or (470) 665-3747.
240V Electrical Requirements (Larger Models)
For El Capitan, Matterhorn, Patagonia, and other 3+ person saunas
Which Models Require 240V?
Larger Peak Saunas models require a 240-volt dedicated circuit:
El Capitan (4-person)
Matterhorn (3-person)
Denali (3-person)
Patagonia Outdoor models
Smaller models (Fuji, Everest) use dedicated 120V/20A circuits.
Electrical Specifications for Your Electrician
Share these specs with a licensed electrician:
Specification | Requirement |
|---|---|
Voltage | 240V |
Amperage | (verify with your model's manual) |
Circuit | Dedicated circuit (no other appliances) |
Breaker | Non-GFCI (verify A with model’s manual) |
Outlet | as specified in your manual |
Wiring | Must be on opposite phases |
Critical: Proper 240V Wiring
A 240V circuit requires power from two separate phases of your electrical panel.
What Can Go Wrong
If wired incorrectly (both legs on same phase), you'll get:
120V on each leg but no 240V across both legs
Sauna won't heat or will underperform dramatically
What Your Electrician Should Verify
Voltage reading: 240V measured across both hot terminals
Breaker placement: Double-pole breaker spanning two phases (not a tandem breaker on same phase)
Dedicated circuit: No other loads on this circuit
Troubleshooting: Sauna Not Heating on 240V Circuit
If your electrician recently installed the outlet and the sauna isn't working:
Have them measure voltage at the outlet with a multimeter
Confirm 240V across both hot terminals
If reading only 120V, the circuit is likely wired incorrectly
Solution: Relocate one leg to the opposite phase in the breaker panel
Before Installation
Consult your owner's manual for exact specifications
Hire a licensed electrician
Ensure compliance with local electrical codes
Consider having the electrician present for first power-on
Questions? Contact [email protected] with your sauna model for specific electrical requirements
Control Panel Troubleshooting Guide
If your sauna's control panel isn't working properly, try these steps before contacting support.
Panel Won't Power On
Check the Basics First
Verify the sauna is plugged in and the outlet has power (test with another device)
Check your circuit breaker — flip it off, wait 30 seconds, flip it back on
Inspect the power cord for any visible damage
For 240V models: Confirm the electrician completed the hardwire installation
Still No Power?
Look for a small reset button on the power box (roof of the unit)
Check if there's an inline fuse that may have tripped
Ensure all cable connections inside the sauna are secure
Display Issues
Screen Is Blank But Sauna Heats
The display may have a loose ribbon cable connection. Do not attempt to open the panel yourself — contact support for guidance.
Screen Shows Error Code
Take a photo of the error code and email it to [email protected]. Include:
Your sauna model
When the error first appeared
Whether the sauna still heats
Screen Is Dim or Flickering
Check if the sauna is in a very cold environment (below 40°F/4°C) — LCD displays can be sluggish in cold
Try a full power cycle: unplug for 5 minutes, then reconnect
Buttons Not Responding
Touchscreen Panels
Clean the screen with a soft, dry cloth (moisture can affect touch sensitivity)
Make sure your hands are dry
Try pressing firmly in the center of each button icon
Physical Button Panels
Check if buttons are stuck or have debris around them
Try pressing each button firmly for 2-3 seconds
Power cycle the sauna
Resetting the Control Panel
Soft Reset
Turn off the sauna using the power button
Wait 60 seconds
Turn it back on
Hard Reset
Unplug the sauna completely (or flip the breaker for hardwired units)
Wait 5 minutes
Restore power
The panel should go through its startup sequence
WiFi/App Connection Issues
If the panel works but won't connect to the app, see our WiFi & App Setup Troubleshooting guide.
When to Contact Support
Contact [email protected] if:
Panel is completely non-functional after trying all steps above
You see visible damage to the panel
There's a burning smell or unusual sounds
Error codes persist after reset
Include in your email:
Sauna model name
Photo of the control panel
Description of the issue
What troubleshooting steps you've tried
How Do I Set Up the SmartLife App to Control My Sauna?
Every Peak Sauna comes with WiFi connectivity and remote control via the SmartLife app. Here's how to get it set up and start preheating your sauna from anywhere.
Download the App
The SmartLife app is free and available on:
iOS: App Store
Android: Google Play
Search for "SmartLife" (one word) or "Smart Life" in your app store.
Setup Steps
1. Create a SmartLife Account
Open the app and create a free account using your email address. You'll need to verify your email.
2. Power On Your Sauna
Make sure your sauna is plugged in and powered on. The WiFi module needs power to broadcast its setup signal.
3. Add Your Sauna
In the SmartLife app:
Tap the "+" button to add a new device
Select your WiFi network and enter your password
The app will search for your sauna's WiFi signal
Follow the on-screen prompts to complete pairing
4. Connect to Your Home WiFi
Your sauna needs to be on the same WiFi network as your phone during initial setup. Once paired, you can control it from anywhere — home, gym, office, or on the road.
What You Can Do with SmartLife
Turn your sauna on and off remotely
Set target temperature before you arrive home
Monitor current temperature in real time
Schedule sessions — set it to preheat at a specific time daily
Check status — see if the sauna is currently running
Troubleshooting Common Setup Issues
App Can't Find the Sauna
Make sure your phone is on 2.4GHz WiFi, not 5GHz. Most smart devices only work on 2.4GHz.
Ensure the sauna is powered on and in pairing mode
Restart both the sauna (unplug for 30 seconds) and your phone
Move closer to the sauna during initial setup
Sauna Shows Offline
Check that your WiFi network is working
Restart your router
Power cycle the sauna
Make sure the sauna hasn't been unplugged
Lost Connection After Setup
If you changed your WiFi password or router, you'll need to re-pair the sauna
Some routers with advanced security settings may block IoT devices — check your router settings
Important: Two Apps, Two Functions
Peak Saunas uses two separate apps:
App | Controls | Download |
|---|---|---|
SmartLife | Sauna heat, temperature, on/off, scheduling | App Store / Google Play |
Peak Saunas RLT | Red Light Therapy panel only (wavelengths, intensity, timer) | App Store / Google Play |
The SmartLife app does not control the red light therapy panel, and the RLT app does not control the sauna heaters. You need both if your model includes RLT.
Still Have Questions?
WiFi setup should only take a few minutes, but if you run into issues, we're here to help. Contact us at [email protected] or (470) 665-3747.
Harvia Heater Not Producing Heat (Hybrid Saunas)
Applies to: Peak Saunas hybrid models with a Harvia traditional Finnish heater (timer-based, wet/dry capable)
Symptom: Timer counts down normally, but the heater unit produces no heat — stones remain cold
Before You Troubleshoot
The Harvia heater is the traditional Finnish heating component on hybrid sauna models. It is separate from the infrared (IR) and near-infrared (NIR) heating panels — if your IR panels are working but the Harvia produces no heat, the issue is specific to the Harvia unit.
Have an electrician already confirmed power is fine? Good — skip to Step 3.
Step-by-Step Troubleshooting
Step 1 — Check the Reset Button
The Harvia heater has a thermal cutout (safety reset) button on the bottom or side of the unit.
Power off the sauna completely
Locate the small red or black reset button on the base or rear of the Harvia heater
Press it firmly until you feel/hear a click
Restore power and test
This button trips when the heater overheats (e.g., stones are stacked too high, blocking airflow). If it trips repeatedly, see "Airflow" below.
Step 2 — Check the Timer Mechanism
The Harvia timer controls power to the heating element. If the timer "counts down" but the element doesn't engage:
Confirm the timer dial actually turns past the 0 position and into the active range — a click should be felt at startup
If the timer ticks but produces no "clunk" sound at turn-on, the timer contact may have failed
With power off, inspect the timer unit for visible burn marks or corrosion around the contacts
A timer that counts down silently (no click/clunk at start) typically indicates a failed timer contact — this is a replaceable part. Contact support.
Step 3 — Check Stone Placement and Airflow
Improper stone placement is a common cause of Harvia heater failure (thermal cutout trips repeatedly):
Stones must be loaded loosely with gaps for air circulation — do not pack them tightly
Stones should not be stacked above the top element guard
Remove all stones, reset the thermal cutout (Step 1), and test with an empty heater basket
If the heater produces heat with no stones, reload them loosely
Step 4 — Inspect the Heating Elements
With power fully disconnected:
Remove the stone basket
Look for heating elements that appear visibly burnt, cracked, or discolored (healthy elements are metallic gray/silver)
Check that all element connections at the terminal block are tight — no loose or corroded wires
A single failed element can cause the heater to underperform or not heat at all
Do not attempt to test elements with a multimeter unless you're experienced with electrical testing. Contact support if elements appear damaged.
Step 5 — Check the Control Box Fuse
Some Harvia models have an inline fuse in the control box:
Power off and unplug (or disconnect breaker for 240V models)
Open the control box cover (typically 2 screws on the side)
Locate the fuse holder — replace with same-spec fuse if blown
Refer to your model's manual for fuse specification
When to Contact Support
Contact Peak Saunas support if:
Timer clicks but no heat after completing all steps above
Elements appear burnt or broken
Reset button trips repeatedly (more than once per session) — indicates a deeper issue
Fuse blows immediately after replacement
What to include in your support message:
Model name (e.g., Trinity, Shasta Hybrid)
Age of unit and approximate hours of use
Which steps you've completed and the result
Whether the issue is intermittent or constant
Email: [email protected]
Or use the chat widget at peaksaunas.com
Spare Parts
Replacement Harvia timers, heating elements, and stone baskets are available. Contact support with your model number for part compatibility and pricing.
WiFi Connection Issues: Troubleshooting When Your Sauna Goes Offline
If your Peak Sauna has lost its WiFi connection, shows as "Offline" in the Smart Life app, or won't stay connected, we're here to help. Most WiFi problems are fixed with quick, no-tools-needed steps.
We'll **start with the fastest and easiest fixes first** — these usually take just a few minutes and resolve the issue for the majority of customers. Please try **both steps below thoroughly** before moving on. If they don't work, the next steps involve removing the outer roof panel to access internal components, which is more time-consuming.
---
Step 1: Soft Reset — Unplug for 15+ Minutes
This simple power cycle clears temporary glitches in the control board or WiFi module.
1. If the sauna is on, turn it off using the control panel.
2. Unplug the main power cord from the wall outlet.
3. **Wait at least 15 minutes.** (This allows the electronics to fully discharge and reset.)
4. Plug the sauna back in.
5. Wait 1–2 minutes for the control panel to fully boot up (lights and display should stabilize).
6. Open the Smart Life app on your phone and pull down to refresh the device list.
Does the sauna now show as online and respond to app commands (heat, red light, etc.)?
- **Yes** → You're good to go!
- **No** → Move to Step 2.
---
Step 2: Forget the Device in the Smart Life App & Set Up from Scratch
App pairings can become corrupted over time (especially after router changes, power outages, or app updates). Completely removing the device and adding it again as new often restores a stable connection.
How to Forget the Device
1. Open the **Smart Life** app.
2. Tap on your sauna in the device list.
3. Tap the **gear icon** (or "..." menu) in the top right.
4. Select **Remove Device**, **Delete Device**, or **Forget Device**.
5. Confirm the removal. The sauna should disappear from your device list.
Set Up from Scratch (Fresh Pairing)
Watch this short video for a clear visual walkthrough of the full setup process:
▶ Watch the Setup from Scratch Video](https://drive.google.com/file/d/1lgO6KqrkMAr8XBEVk13xH3b9mevn7c9M/view?usp=drive_link)**
**Quick text steps for reference:**
1. Put your sauna into **pairing mode**:
- On the control panel: Navigate to **Settings → WiFi → Pairing Mode**, **OR**
- Press and hold the **WiFi button** for 5–7 seconds until the WiFi indicator light blinks rapidly (you have a 2-minute window).
2. In the Smart Life app, tap the **+** icon → **Add Device** → **Small Home Appliances** → **Heater** (or search for "Infrared Sauna").
3. Select your **2.4 GHz WiFi network** (critical: do **not** select a 5 GHz network — many routers broadcast both; use the 2.4 GHz SSID specifically).
4. Enter your WiFi password and follow the prompts.
5. Once connected, name the device and test basic controls.
**Tip:** If your router uses a single SSID for both bands (band steering), temporarily disable it or create a separate 2.4 GHz network name for IoT devices like your sauna.
After successful pairing, test turning the sauna on/off, adjusting temperature, and controlling the red light panel from the app.
---
If Steps 1 & 2 Don't Fix It
We're sorry these quick fixes didn't resolve the issue. At this point, further troubleshooting typically requires removing the outer roof panel to inspect or reset the internal WiFi module / control board connections. This is more involved, so we'd rather guide you personally to avoid any unnecessary disassembly.
Please contact our support team and let us know:
- Your order number (or sauna model)
- That you've already completed the soft reset (Step 1) and full re-setup (Step 2)
- Whether the WiFi light on the control panel behaves normally
- Any recent changes (new router, moved sauna, power outage, etc.)
**Contact options:**
- **Email:** [email protected] (fastest for photos/screenshots)
- **Phone:** (312) 548-8943
**Hours:** Monday–Friday 8:00am–7:00pm CST | Saturday 12:00pm–7:00pm CST
We'll walk you through the next steps or arrange a replacement part if needed. Our team is experienced with these exact situations and will make it as painless as possible.
---
Prevention Tips for Stable WiFi
- Use a strong 2.4 GHz signal (add a WiFi range extender or mesh node near the sauna if the router is far away).
- Avoid changing your WiFi password or router frequently without re-pairing the sauna.
- Plug the sauna into a surge protector to protect sensitive electronics from power fluctuations.
- Keep the Smart Life app updated.
- If you have a dual-band router, consider creating a dedicated 2.4 GHz SSID just for smart devices.
---
**Still stuck?** Reach out anytime — we're happy to help get your sauna back online quickly.
*This article is part of the Peak Saunas Help Center. For the full WiFi & App Setup guide, see our [WiFi & App Setup](/help/wifi-app-setup) article.*
Choosing a Peak Sauna
MODEL DIMENSIONS (Exterior — Width × Depth × Height)
Rainier — 1 Person: 42" × 40" × 75"
Shasta — 1 Person: 42" × 40" × 75"
Fuji — 2 Person: 53" × 44" × 75"
Everest — 2 Person: 53" × 44" × 75"
Matterhorn — 3 Person: 61" × 44" × 75"
Denali — 3 Person: 61" × 44" × 75"
Note: All saunas require a 1" minimum gap around the side walls for airflow. We also recommend a 4–6" gap above the ceiling for access to power components.
CLEARANCE REQUIREMENTS
When planning your space, add the following to the exterior dimensions:
- Sides & back: 1–2" minimum
- Above ceiling: 4–6" for electrical access
- In front of door: 18–24" for comfortable entry/exit
- Ceiling height: At least 6'8" (80") is ideal for comfortable headroom inside
PRODUCT BROCHURES & SPEC SHEETS
2-Person Models:
3-Person Models:
Still have questions? Email [email protected] — our team is happy to help!